How to Add Reviews to Shopify (Build Trust & Make More Sales)
When upselling a product, it helps when you’re pitching an item that other people already love. The same could be said for the initial sale. Customers want to see what others have to say about an item before buying.
Does the shirt run small or large? Do dogs actually play with the chew toy? Can you expect a set of bedsheets to fall apart in a year? These questions are often answered by product reviews. So, it’s essential for merchants to learn how to add product reviews to your Shopify store.
Reasons to Add Product Reviews to Shopify

There’s a wide range of ways to convince people to purchase a product, but the old “word of mouth” method still stands as one of the best options. The ecommerce version of “word of mouth” is the online review. Customers share information about a product to sing its praises or warn others about its downsides.
Product reviews are so prevalent, and so relied upon, that over 99.9% of consumers read reviews when shopping online.
That could mean that customers simply skip over your shop because it’s missing product reviews!
And there are plenty of other benefits to adding product reviews to your Shopify store:
- Show product popularity while upselling: Brands use ReConvert to upsell products, but those upsell attempts become even stronger when you can show quality product reviews.
- Inform your customers: Product reviews often answer questions customers can’t find in product descriptions, saving an email to your customer support team.
- View how you can improve your business and products: A product review not only helps customers make decisions, but it provides immediate feedback for companies to fix product descriptions, change features, and improve customer support.
- More trust: It’s transparent and potentially risky to display product reviews. That risk, however, opens up a level of trust between you and customers, since you’re comfortable showing the pros and cons of your items, and open to feedback.
- Social proof: Each rating and review serves as a vote from the public, stating that others should buy a product.
The list goes on with the benefits of product reviews, but at some point, you must give it a try yourself. Keep reading for a step-by-step tutorial on how to add product reviews to your Shopify store.
Best Practices For Adding Reviews to Shopify
Here are some best practices for adding reviews to your Shopify store:
Enable reviews for all products: Make sure that reviews are enabled for all products in your store. This will encourage customers to leave feedback and help build a sense of community around your brand.
Use a review app: Consider using a review app to manage and display customer reviews on your store. There are several great review apps available on the Shopify app store, such as Product Reviews, Loox, Yotpo, Judge.me, and Stamped.io.
Prompt customers to leave reviews: Send follow-up emails to customers after they make a purchase, encouraging them to leave a review. You can also offer incentives, such as a discount code, for leaving a review.
Respond to reviews: Take the time to respond to both positive and negative reviews. Thank customers for their feedback and address any issues they may have raised.
Display reviews prominently: Display customer reviews prominently on your product pages, so that potential customers can easily see them. You can also create a dedicated reviews page on your website.
Use rich snippets: Use rich snippets to display star ratings and review counts in Google search results. This can help increase click-through rates and drive more traffic to your store.
By following these best practices, you can create a strong review system that helps build trust with your customers and drives sales for your business
How to Add Product Reviews to Your Shopify Store
By default, Shopify doesn’t come with a built-in product review feature. There are several apps (free and paid), though, to add the functionality quickly.
Follow along to learn the fastest way to display product reviews on your Shopify store. Thereafter, we’ll go over additional styling and customization tips.
Step 1: Pick and Install a Shopify Reviews App
There are over 7,000 apps to choose from in the Shopify App Store, many of which are for collecting and displaying product reviews.
Shopify’s Product Reviews app is the simplest way to add product reviews, and it’s free forever.
However, we recommend testing product review apps that may add more features—like for photo reviews, “Like” buttons, and industry-specific ratings for things like sizing or interface appearance. You might even want a product review app that integrates directly with ReConvert, like Rivyo, Loox, or Judge.me.
For this tutorial, we’ll show you how to install and operate Shopify’s Product Reviews app, but we encourage you to explore other apps as well.
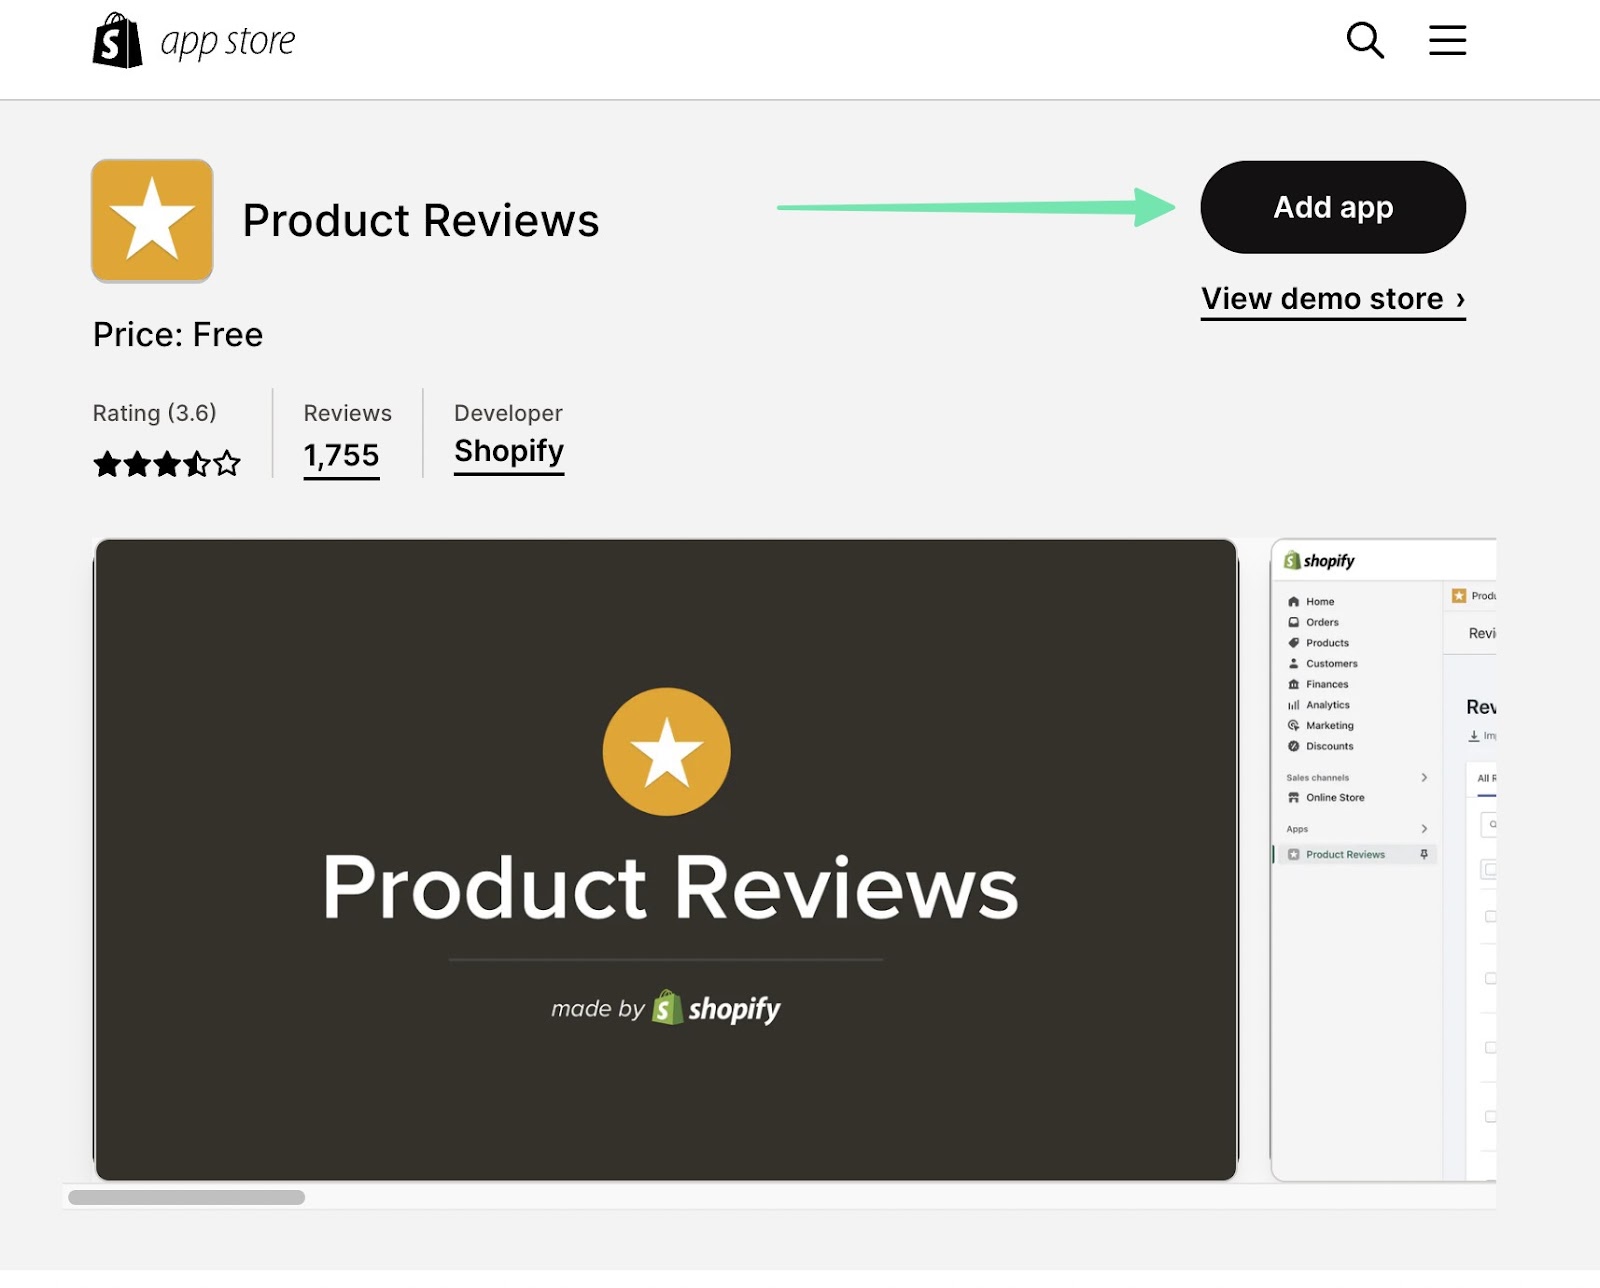
Therefore, go to the Product Reviews page (while logged into your Shopify dashboard). Click the Add App button.
This sends you back to the Shopify dashboard, and it explains privacy policy information about the integration. Once read, click the Install App button.

With the Product Reviews app successfully installed, you’ll see a Product Reviews tab under the Apps menu item. When clicked, that brings you to a “getting started” guide to place product reviews on your website.

Make sure you already have some products published on your store. Otherwise, any further customizations won’t appear on the site, since customers have no products to review.
Step 2: Configure Settings for Shopify Product Reviews
Before accepting reviews from customers, and publishing them on your website, you’ll want to ensure you have all the settings configured properly. This involves the publication process, email settings, and colors for star ratings.
Click the Product Reviews tab under Apps in Shopify.
The following page has every setting available for the Product Reviews app from Shopify.
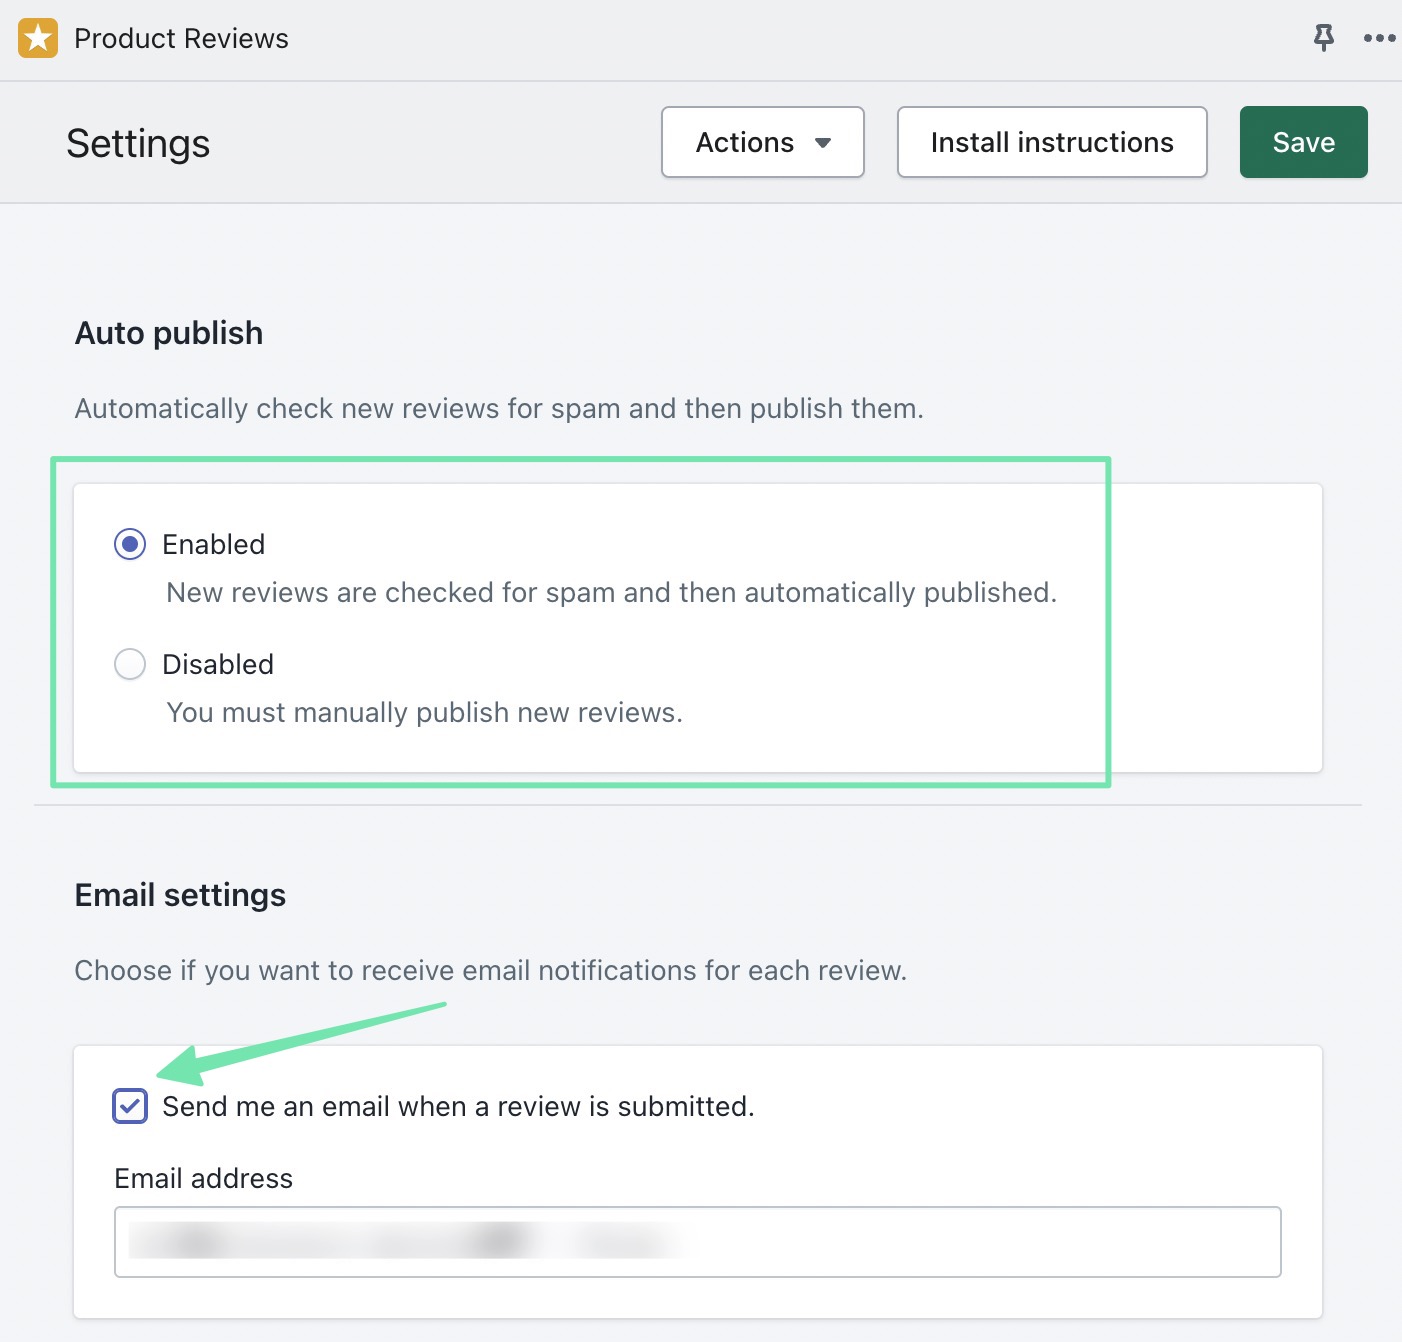
Start with the Auto Publish section:
- Enable: Shopify automatically publishes customer reviews after running them through a spam checker.
- Disable: Shopify sends the customer reviews to you to manually approve.
We recommend starting with the Disabled setting, then switching Auto Publish to Enabled once the volume of reviews becomes too much to handle.
The Email Settings section allows you to receive an email whenever a new review is submitted. Simply fill in the email address.
The following section provides customization settings for the product review modules.
Adjust these as needed:
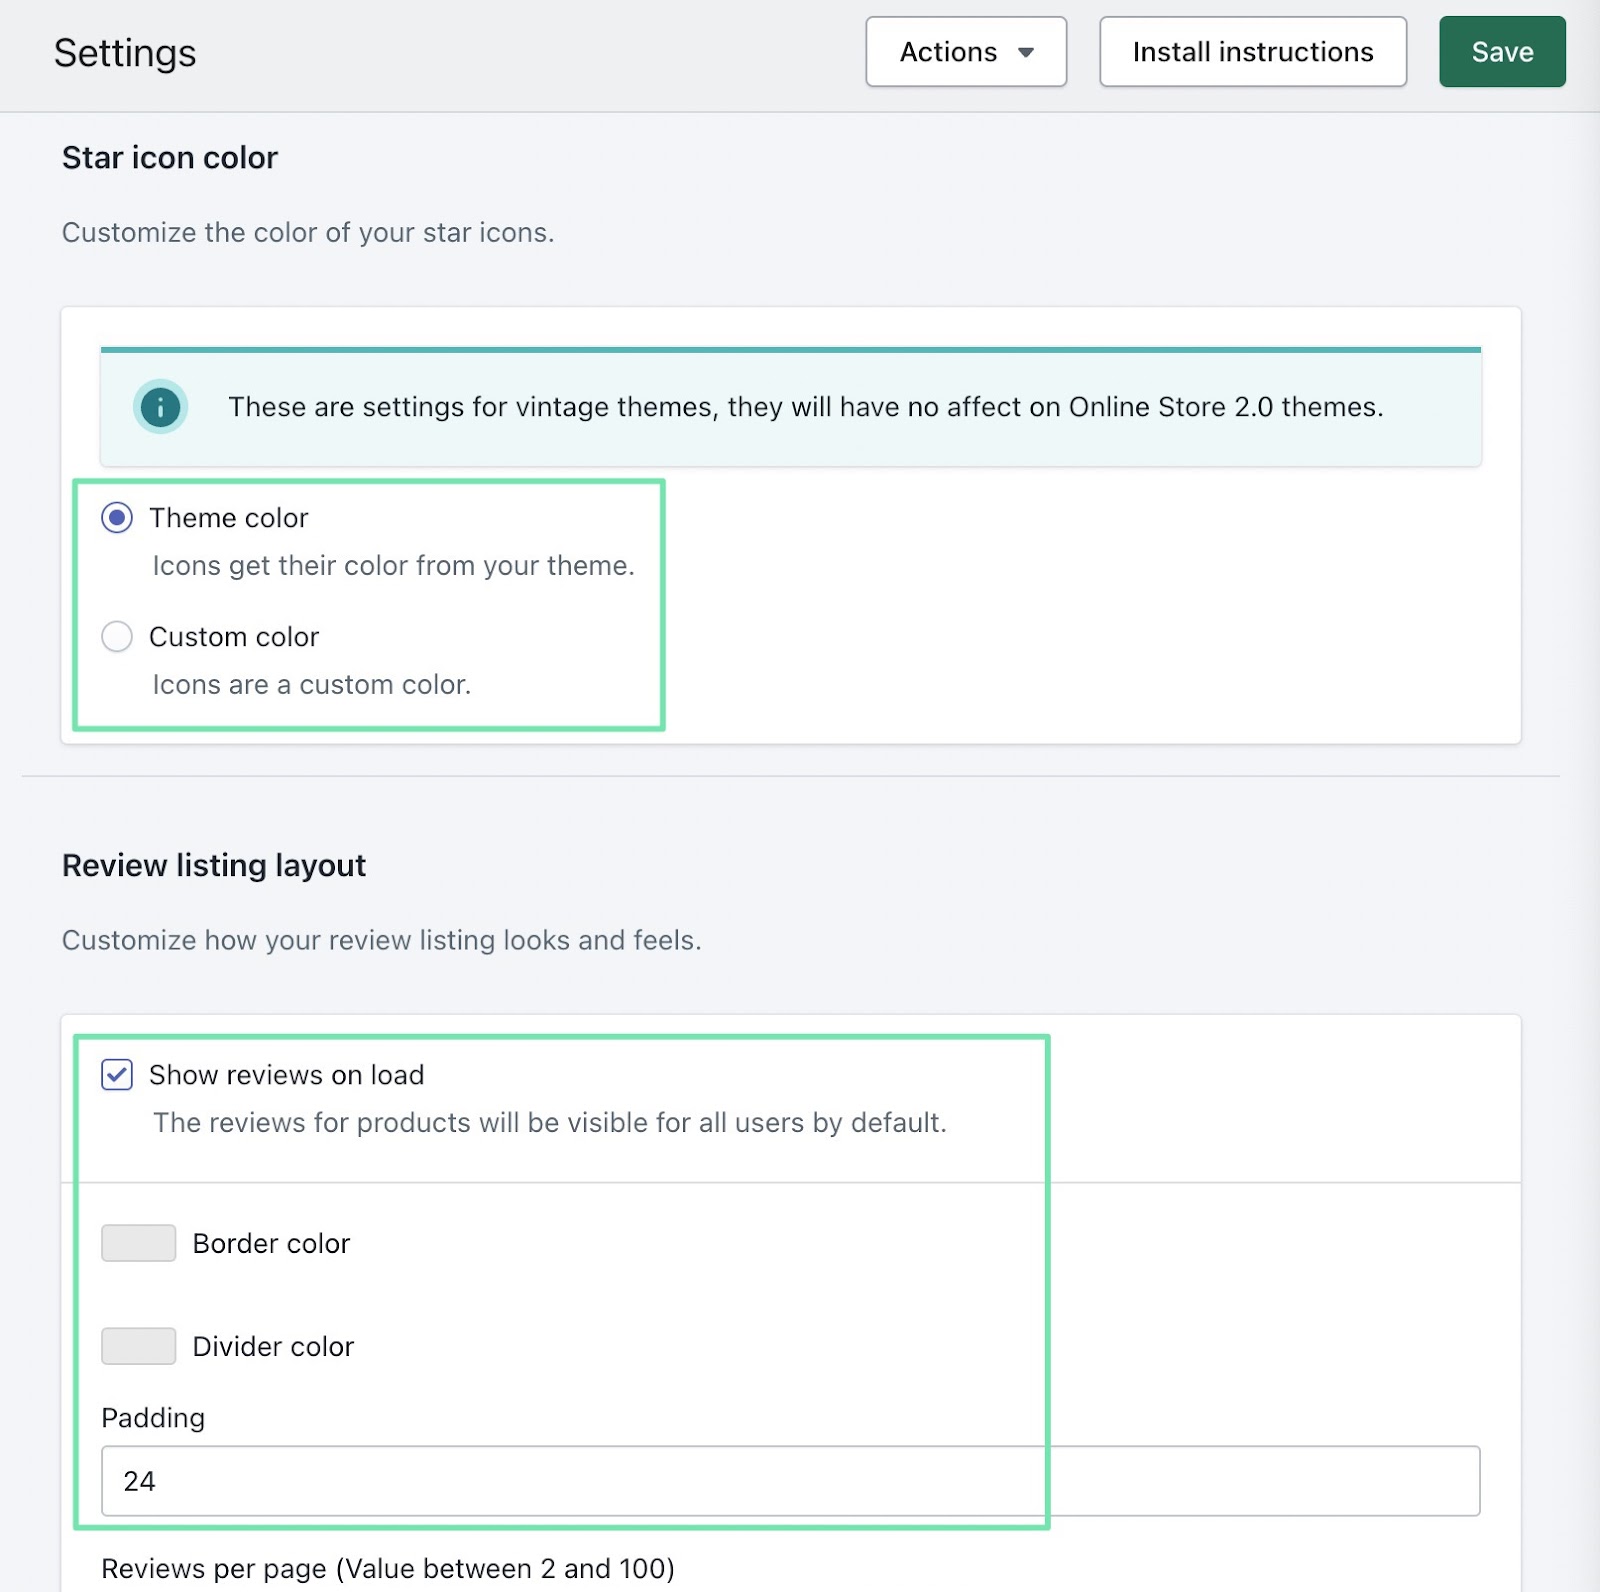
- Color of the star icons: Choose to match it with your theme color or go with a custom color.
- Show reviews on load: Reveals reviews for all users by default.
- Border and divider colors: Custom colors for the border and divider for reviews.
- Padding and reviews per page: Helps to spread out the reviews and limit the number of reviews shown.
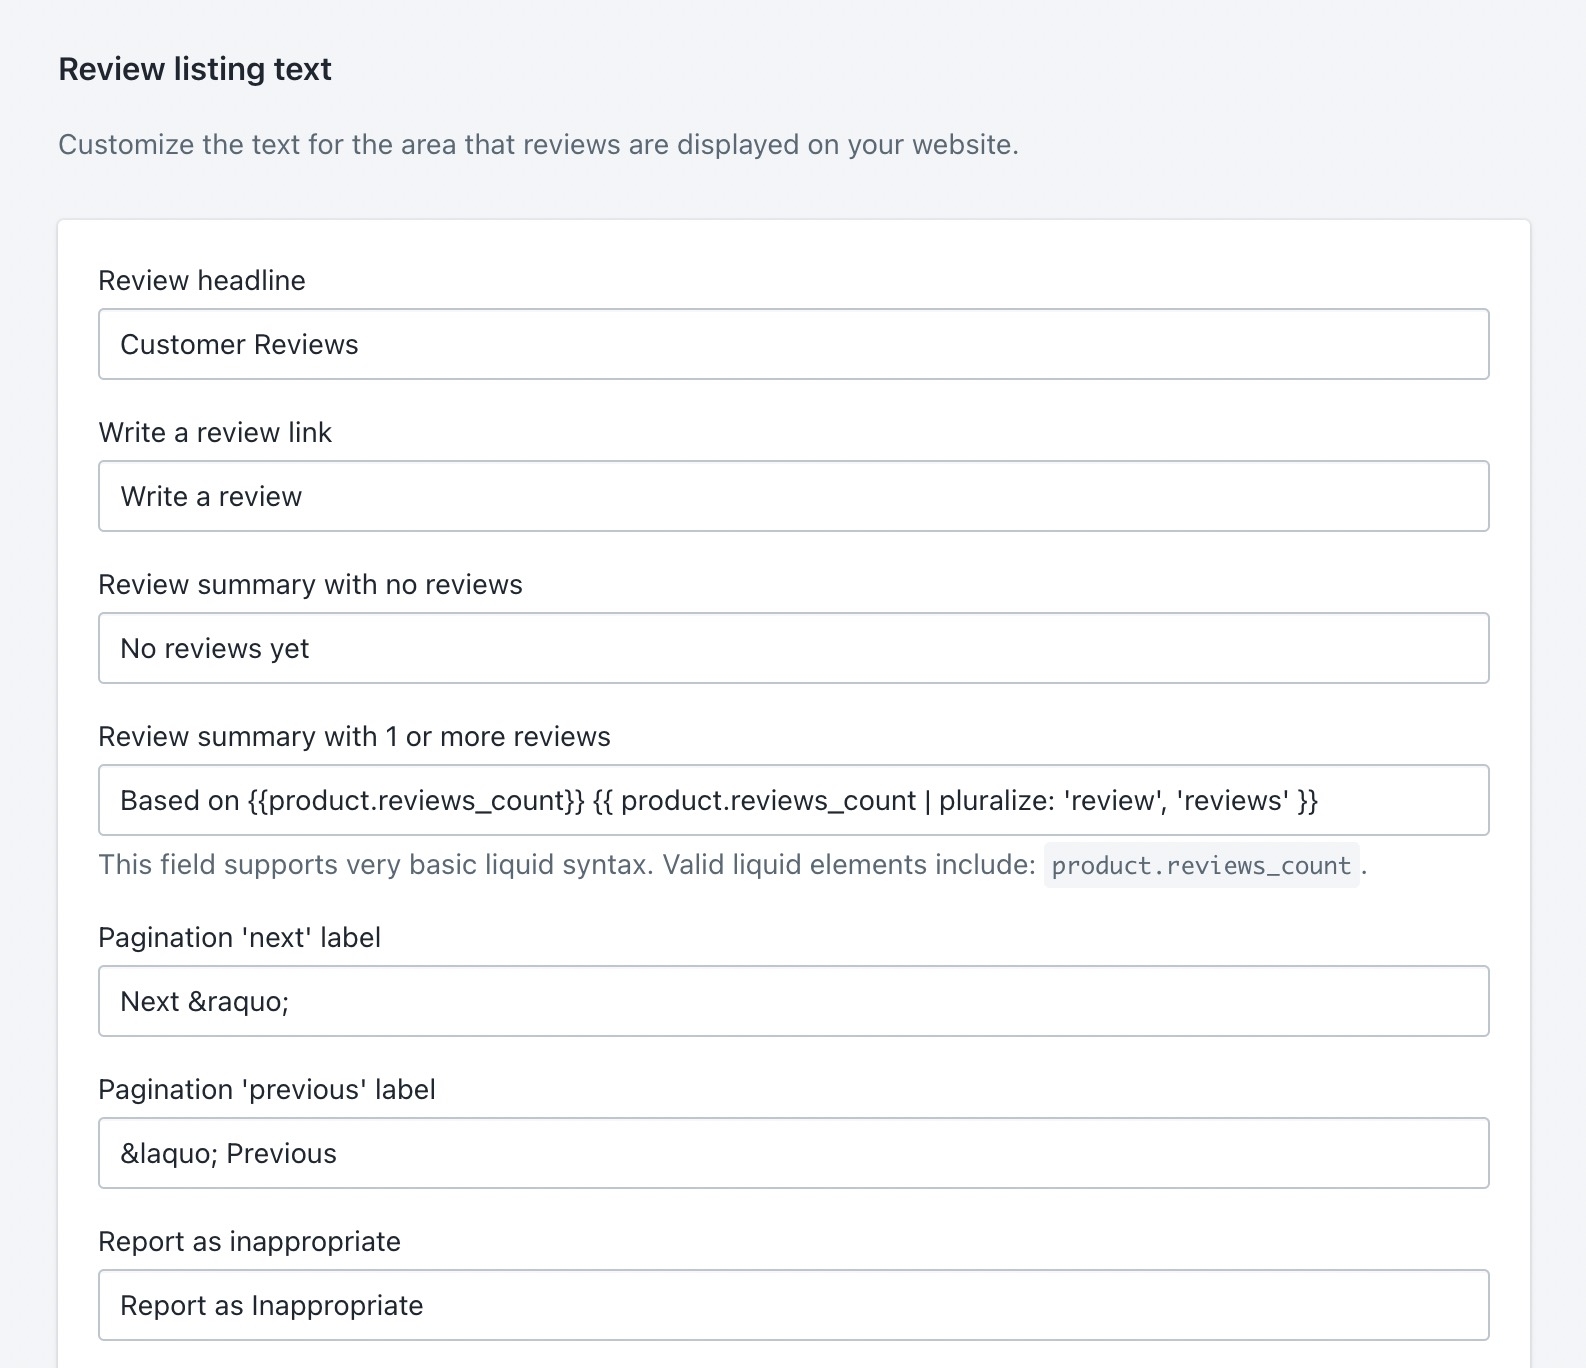
The Reviews Listing Text section provides a myriad of settings to customize the display of the review form and the box that displays reviews.
Customize options like:
- Review headline
- Write a review link
- Review summary with no reviews
- Pagination “next” label
- Report as inappropriate text
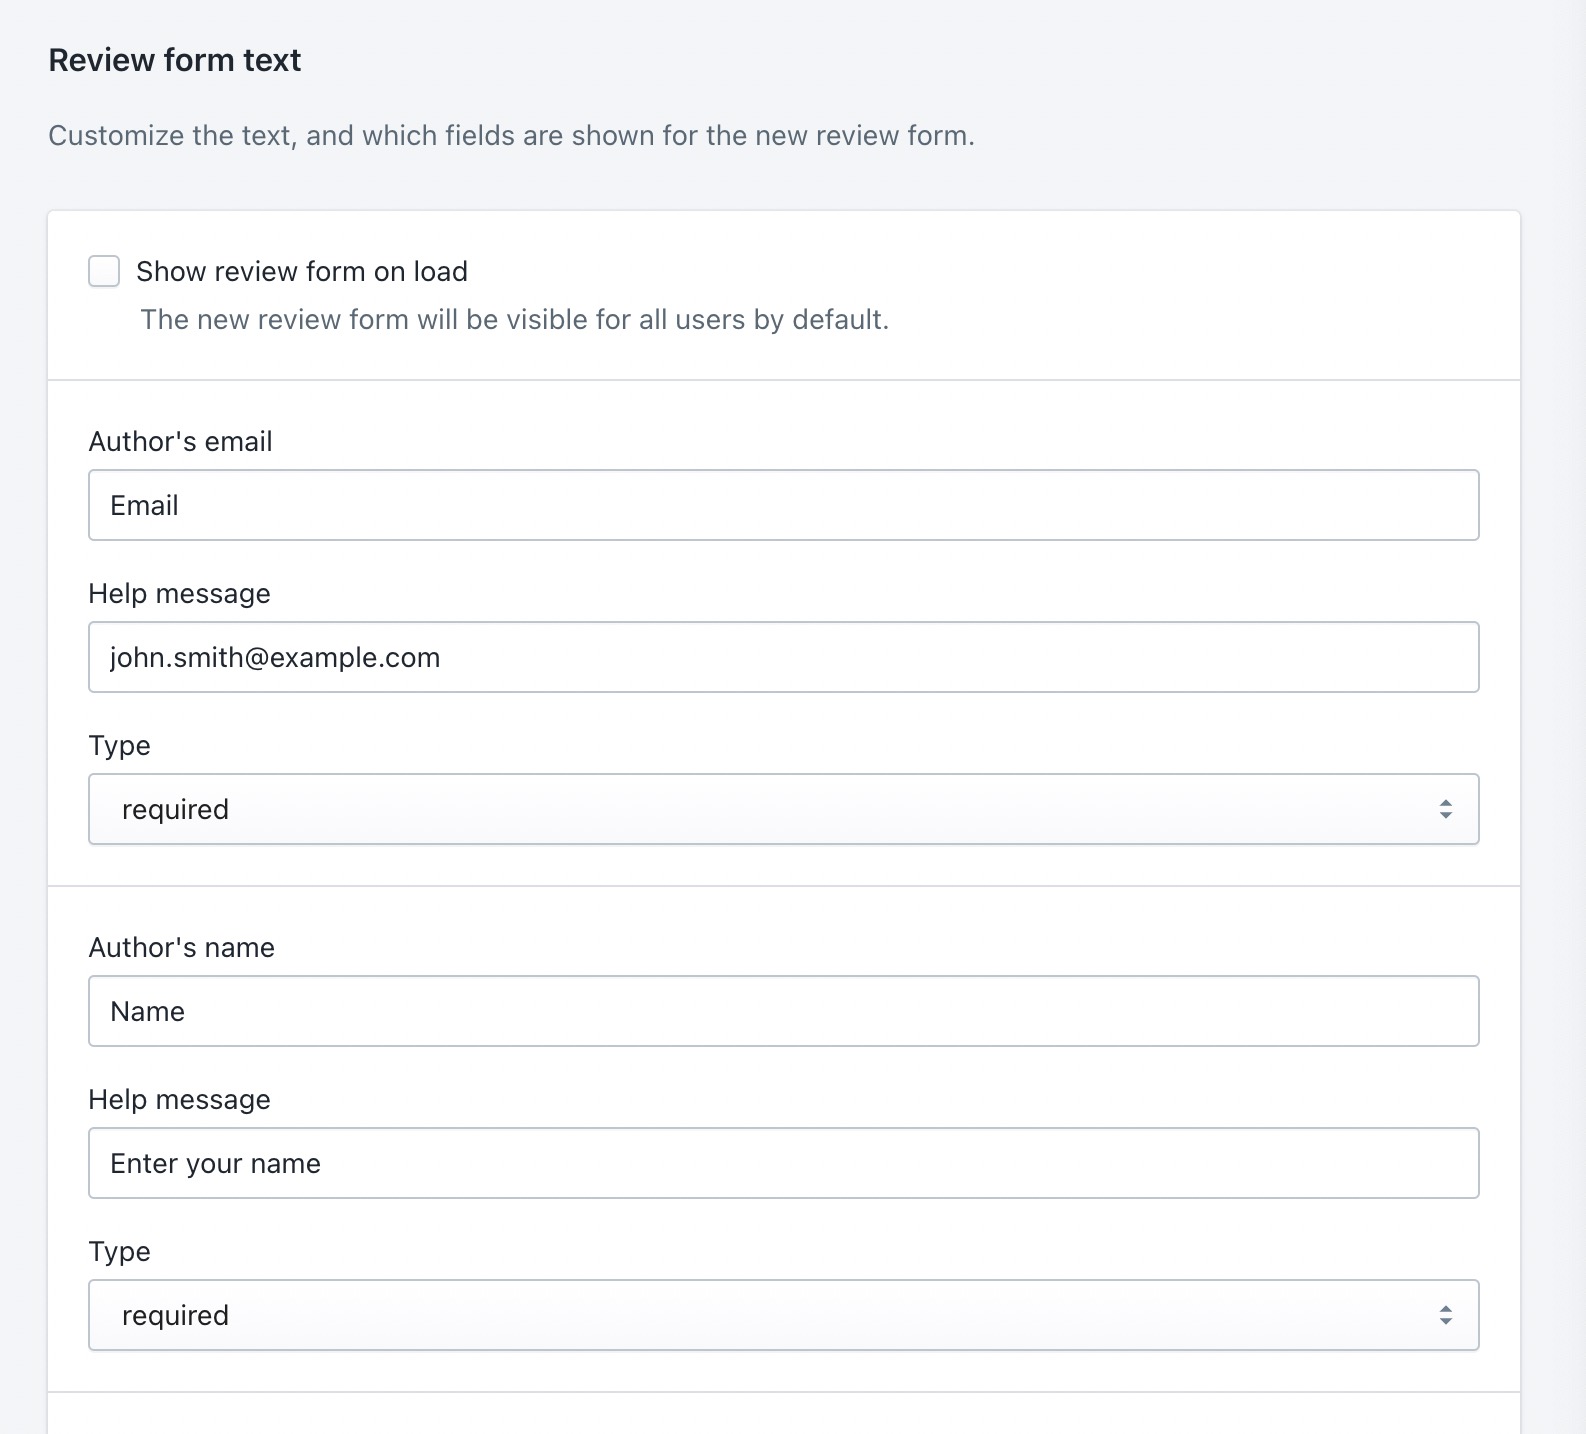
The Review Form Text area is similar, but more focused on the form that accepts reviews from customers. Here, it’s possible to customize all field labels for the review form.
For instance, you could change anything from the Author’s Email text to the Help Message text.
The Badge Text section is available for some older themes. It displays customizable text whenever no reviews are available, along with an area to edit what’s shown when a badge has 1 or more reviews.

Be sure to click the Save button when you’re done customizing the review forms.
Step 3: Publish Shopify Product Reviews and Ratings on Your Store
The overall goal with this process is to display a module for customers to write their own product reviews, while also displaying past ratings and reviews for other customers to see.
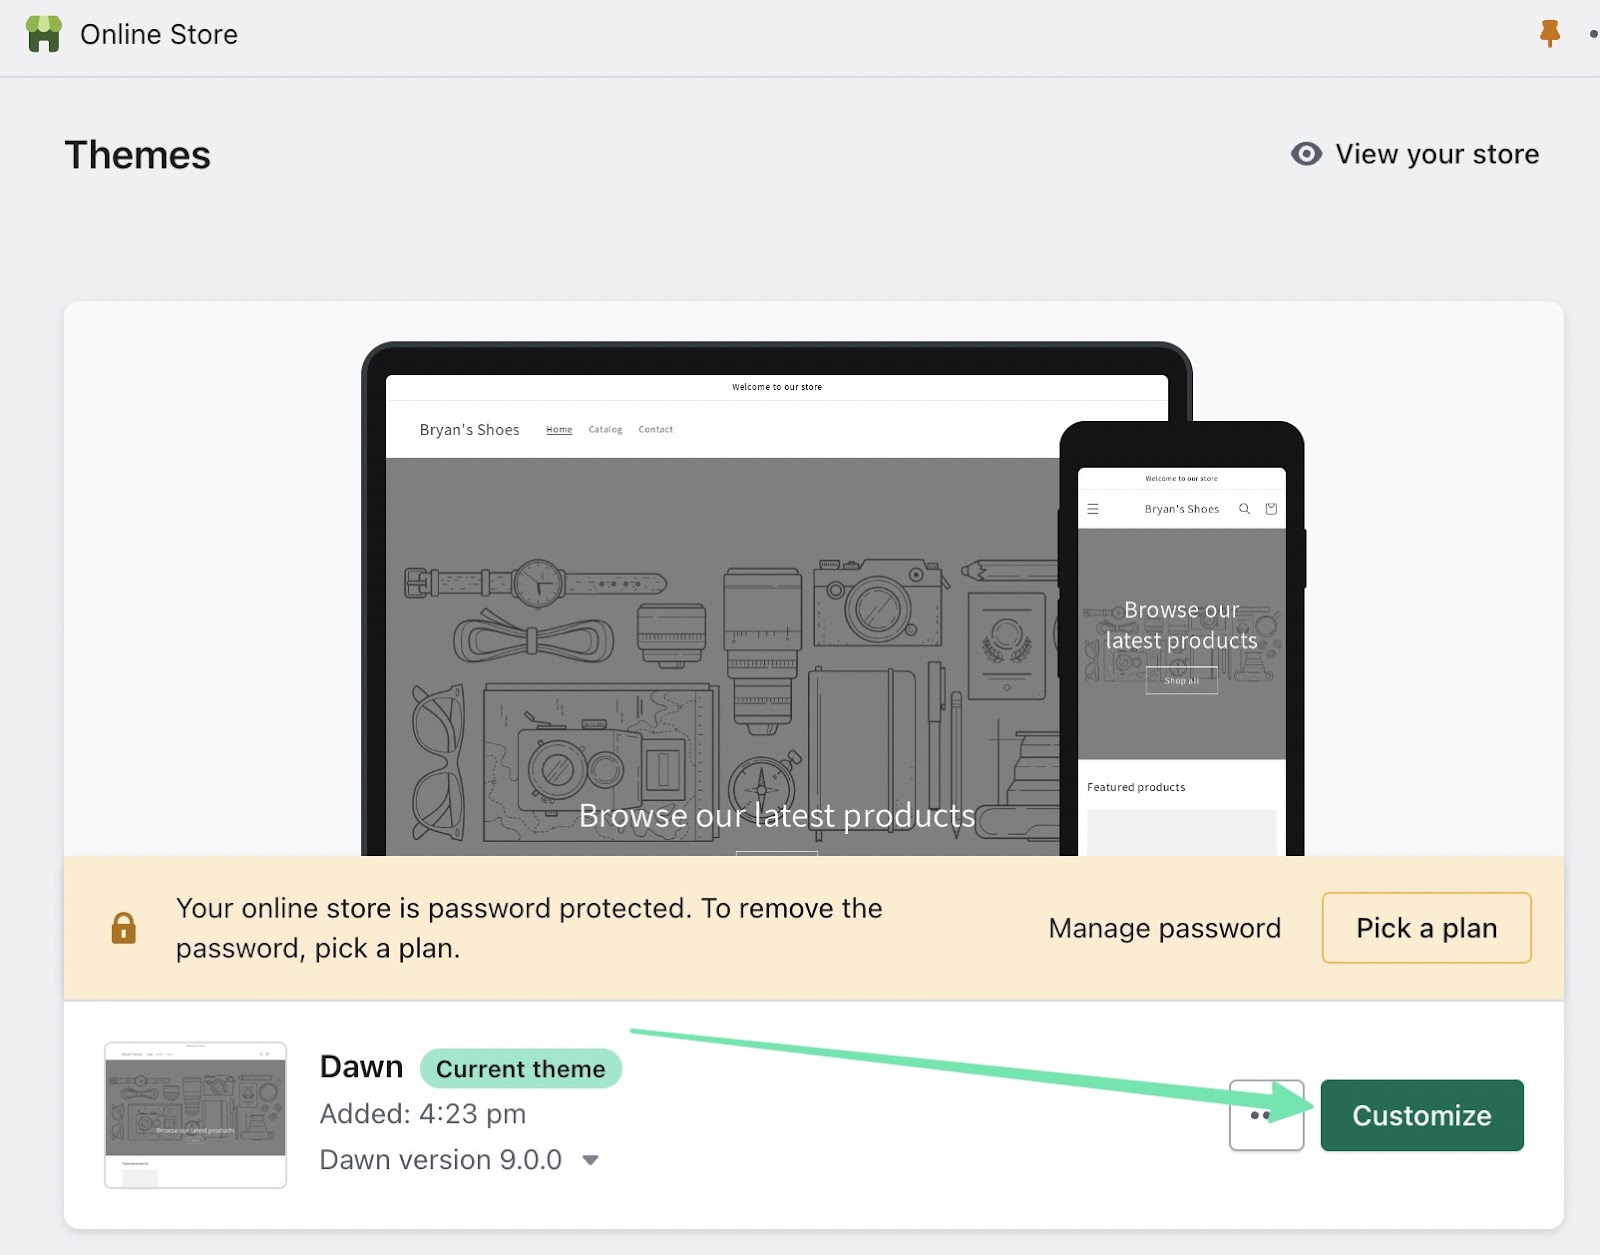
To do both, go to the Sales Channels > Online Store > Themes in Shopify.
Find the theme you’d like to customize (most likely the Current Theme) and click Customize.
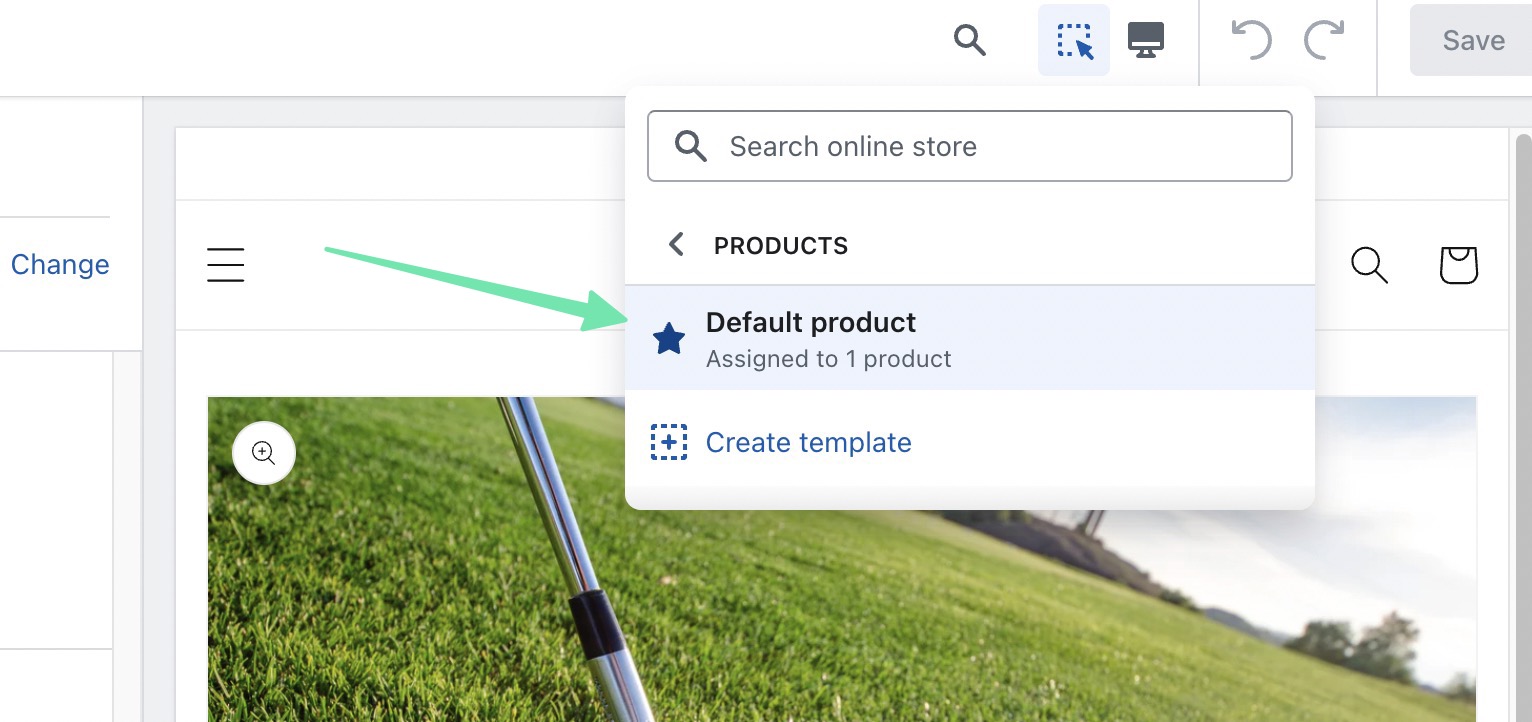
This brings you to the Shopify Theme Editor. Click on the Magnifying Glass (Search) button at the top, and select the Products template.

Pick the actual template assigned to all products in your store. Keep in mind that you may have to customize multiple product page templates if you’ve added multiple templates.
You’re now in the Product page view of the Shopify Editor. Click the Add Section button in the area of the product page you want the reviews to appear.
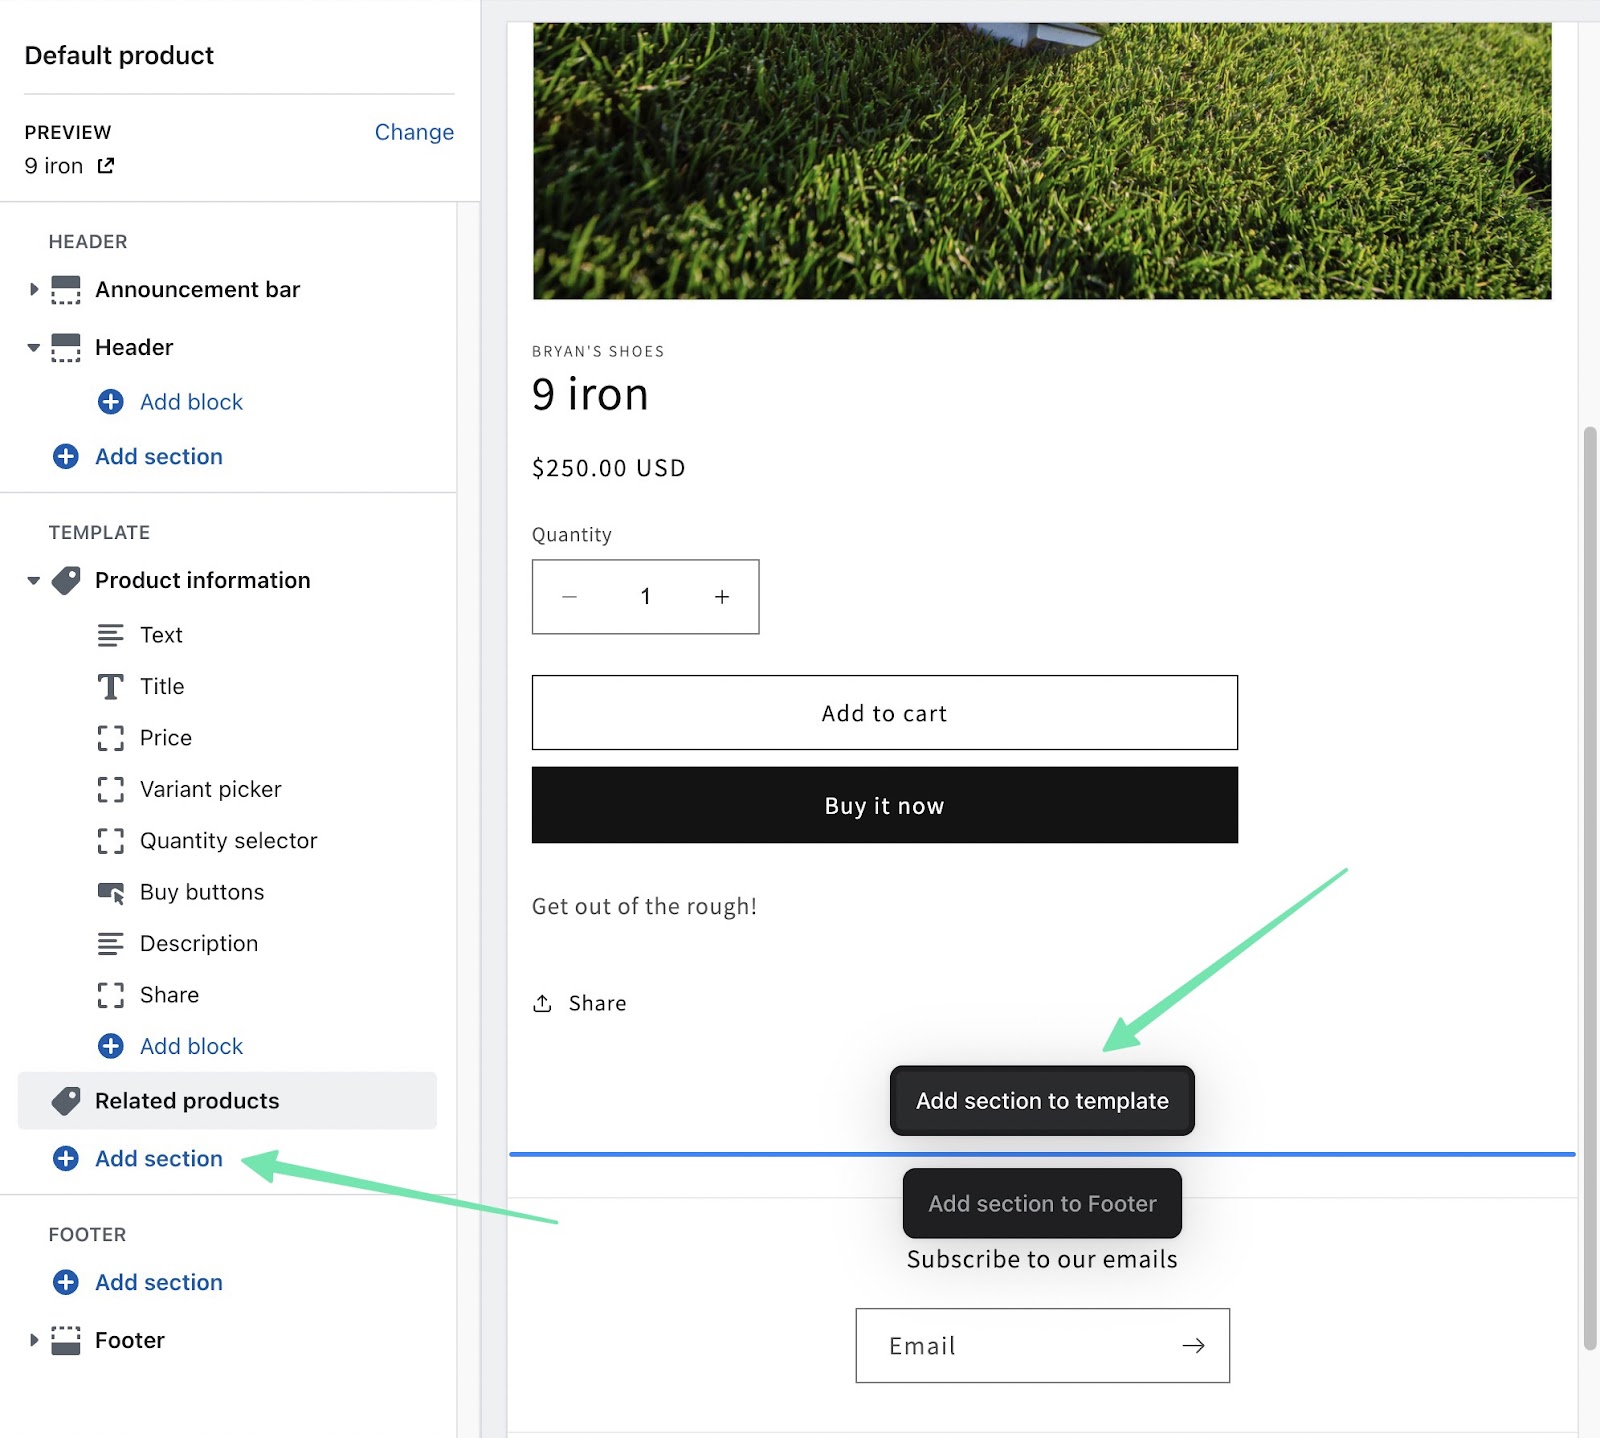
Search for the Reviews app and add it to the page.
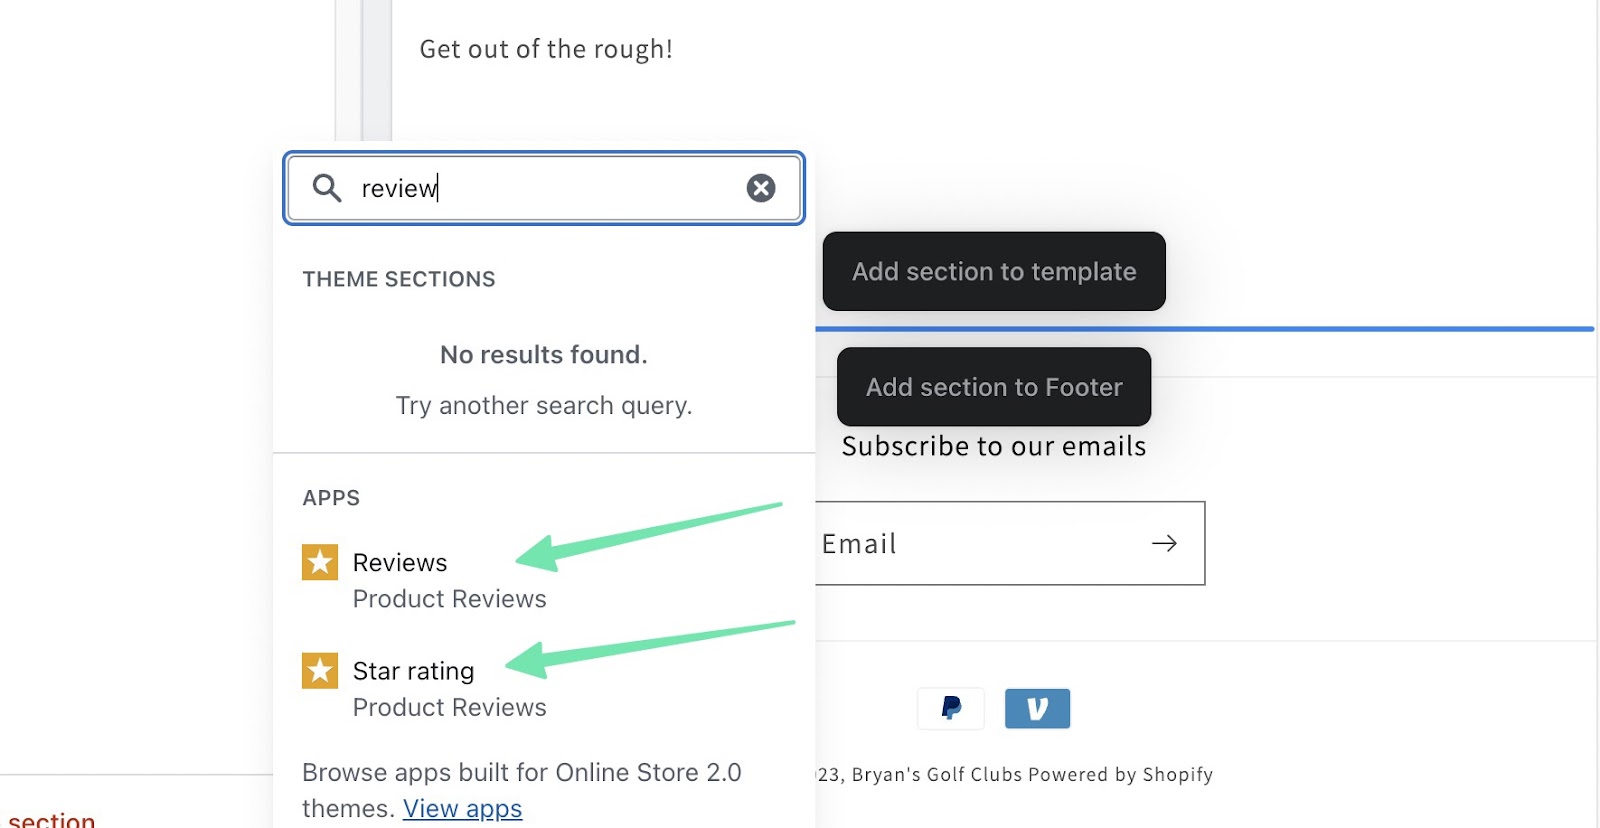
As a result, a Customer Reviews section appears on the product page (and every product page with the same page template). Another option is to use the Ratings block, which only displays the overall rating of a selected product.

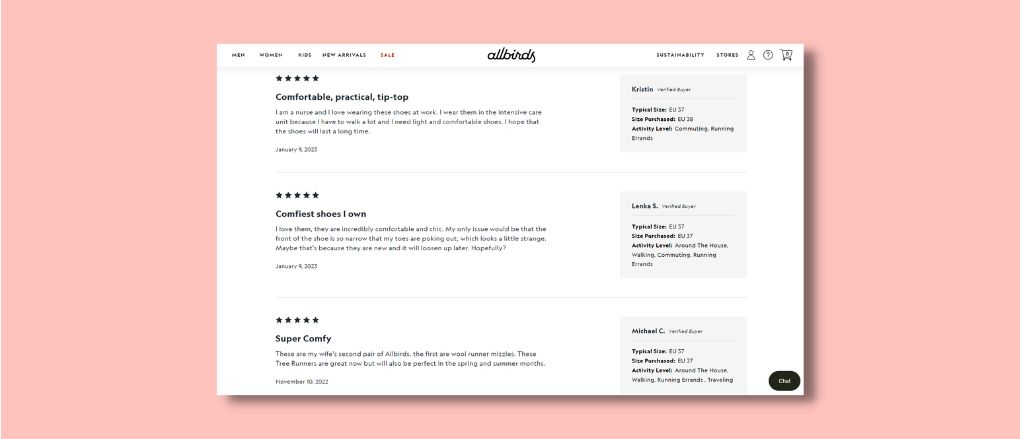
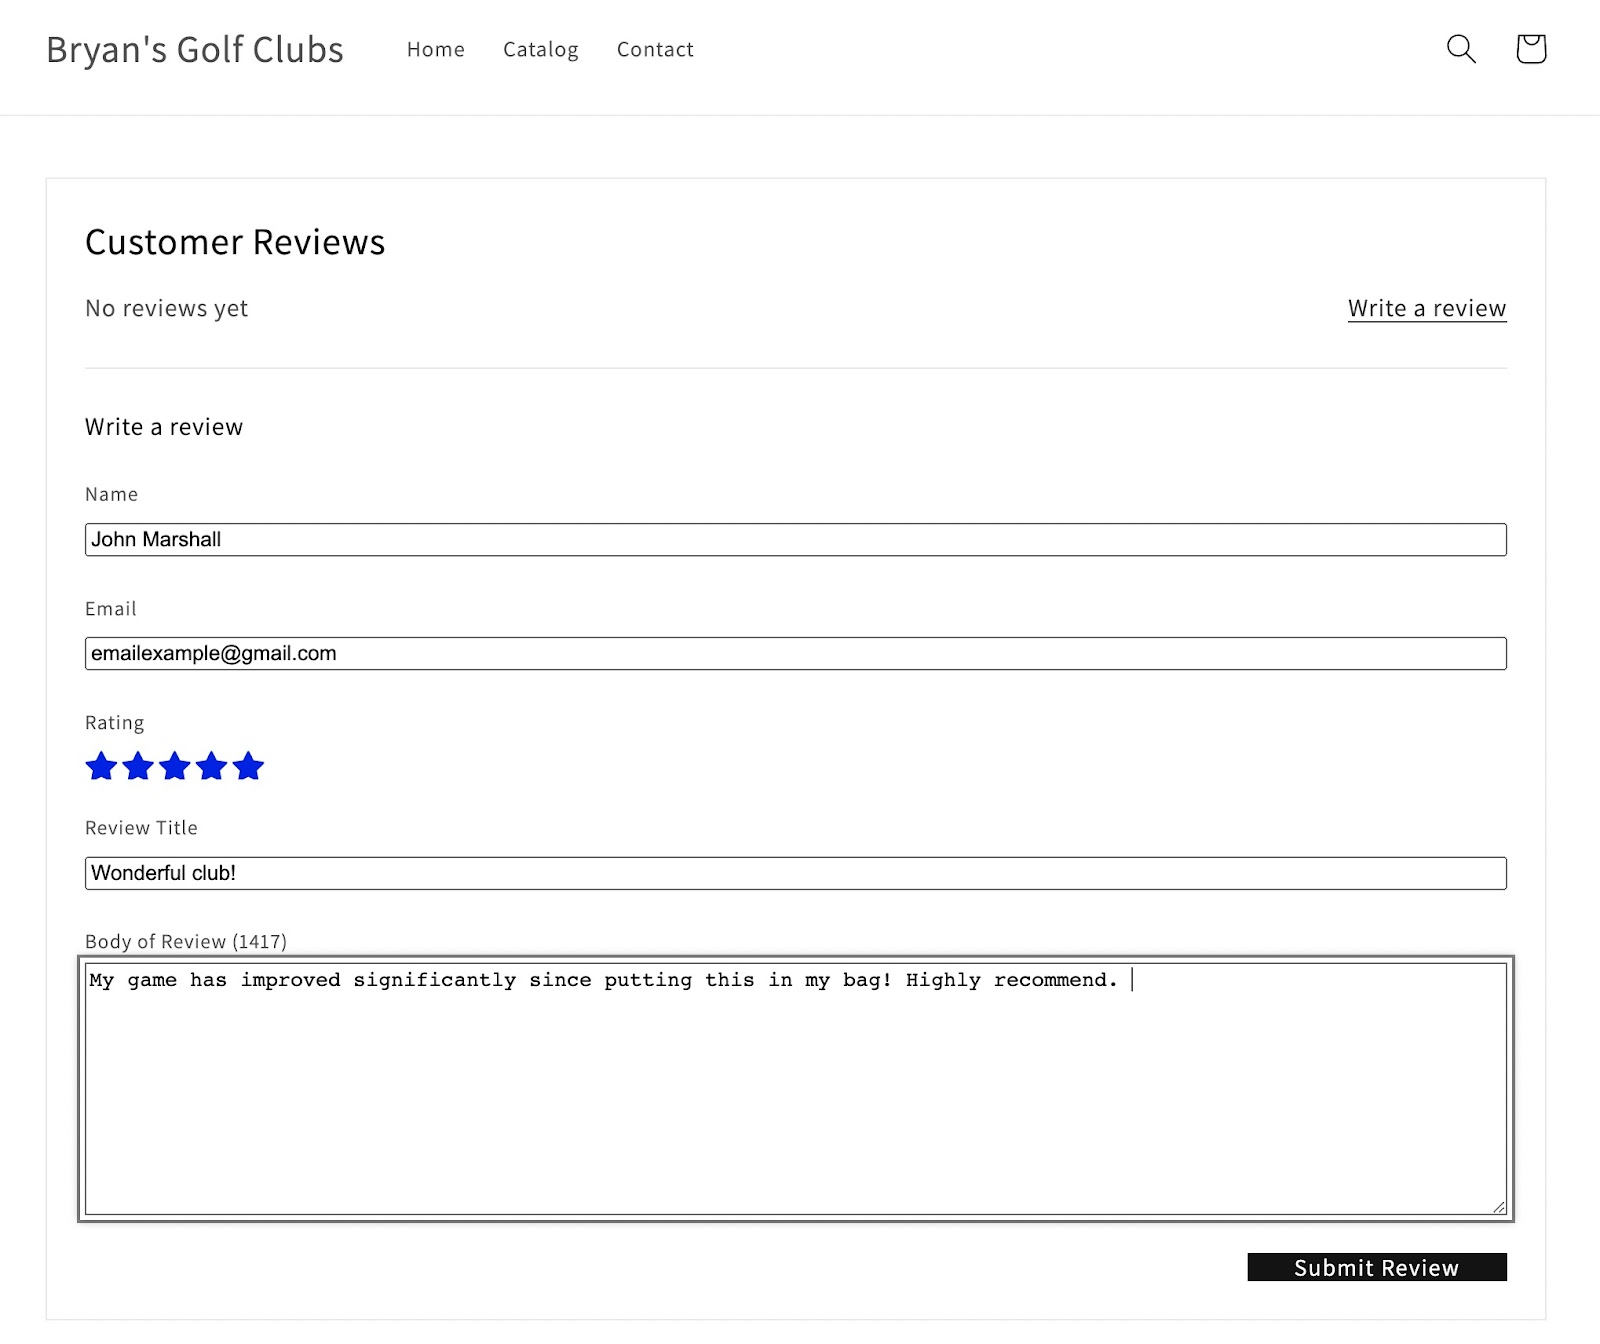
Now, when a customer navigates to one of your Shopify products, they see a section for Customer Reviews, along with a link to click and rate the product.

Several fields appear:
- Name
- Rating
- Review Title
- Body of Review
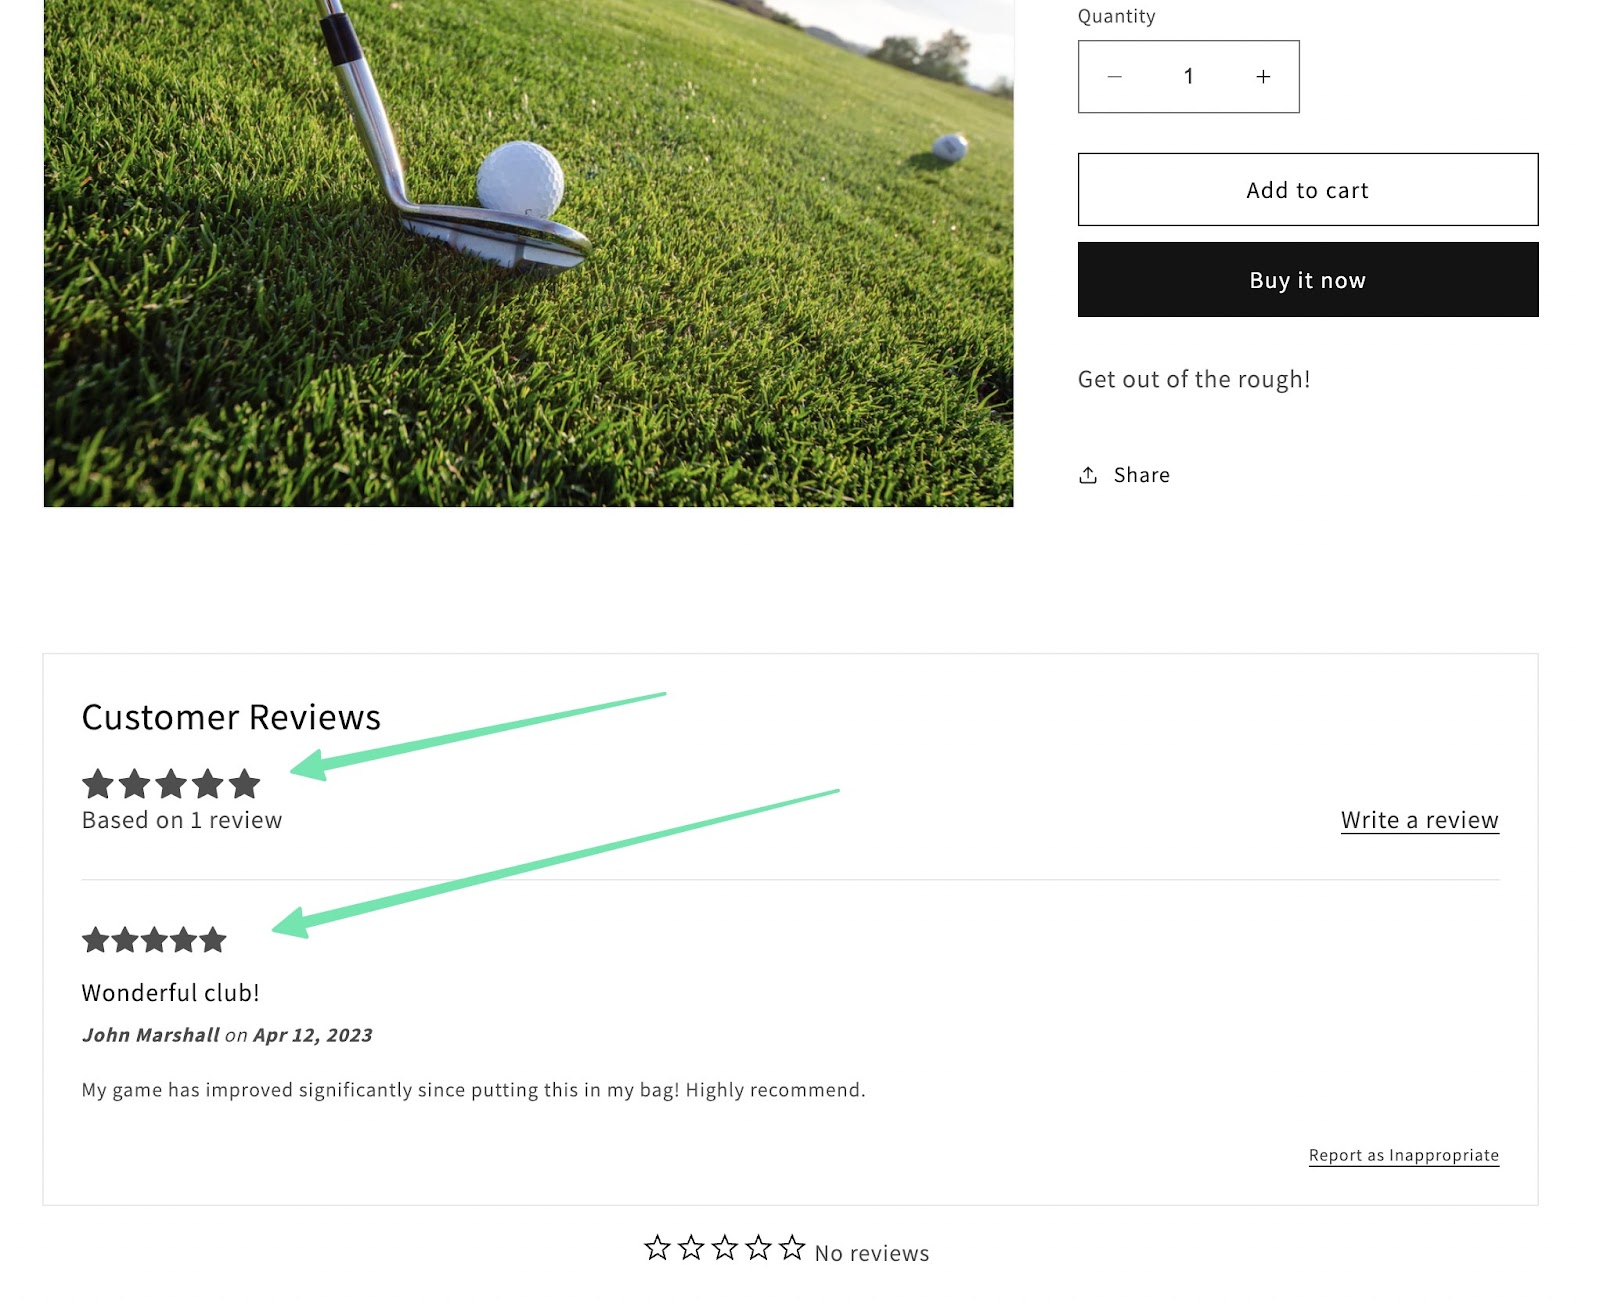
Once a customer fills all those out, they click on the Submit Review button to have it published on the page (or for the admin to manually approve it).
Once published, that particular product page shows all reviews submitted, and an aggregate rating for customers to quickly see how the general population views the item.
Step 5: How to Add Product Reviews on Other Pages
Adding a section for reviews on product pages doesn’t automatically mean that those items will have their ratings attached when shown on the homepage, or in other collections. You must configure those ratings to appear elsewhere.
The easiest way to activate ratings on other pages is to open the target page in the Shopify Theme Editor.
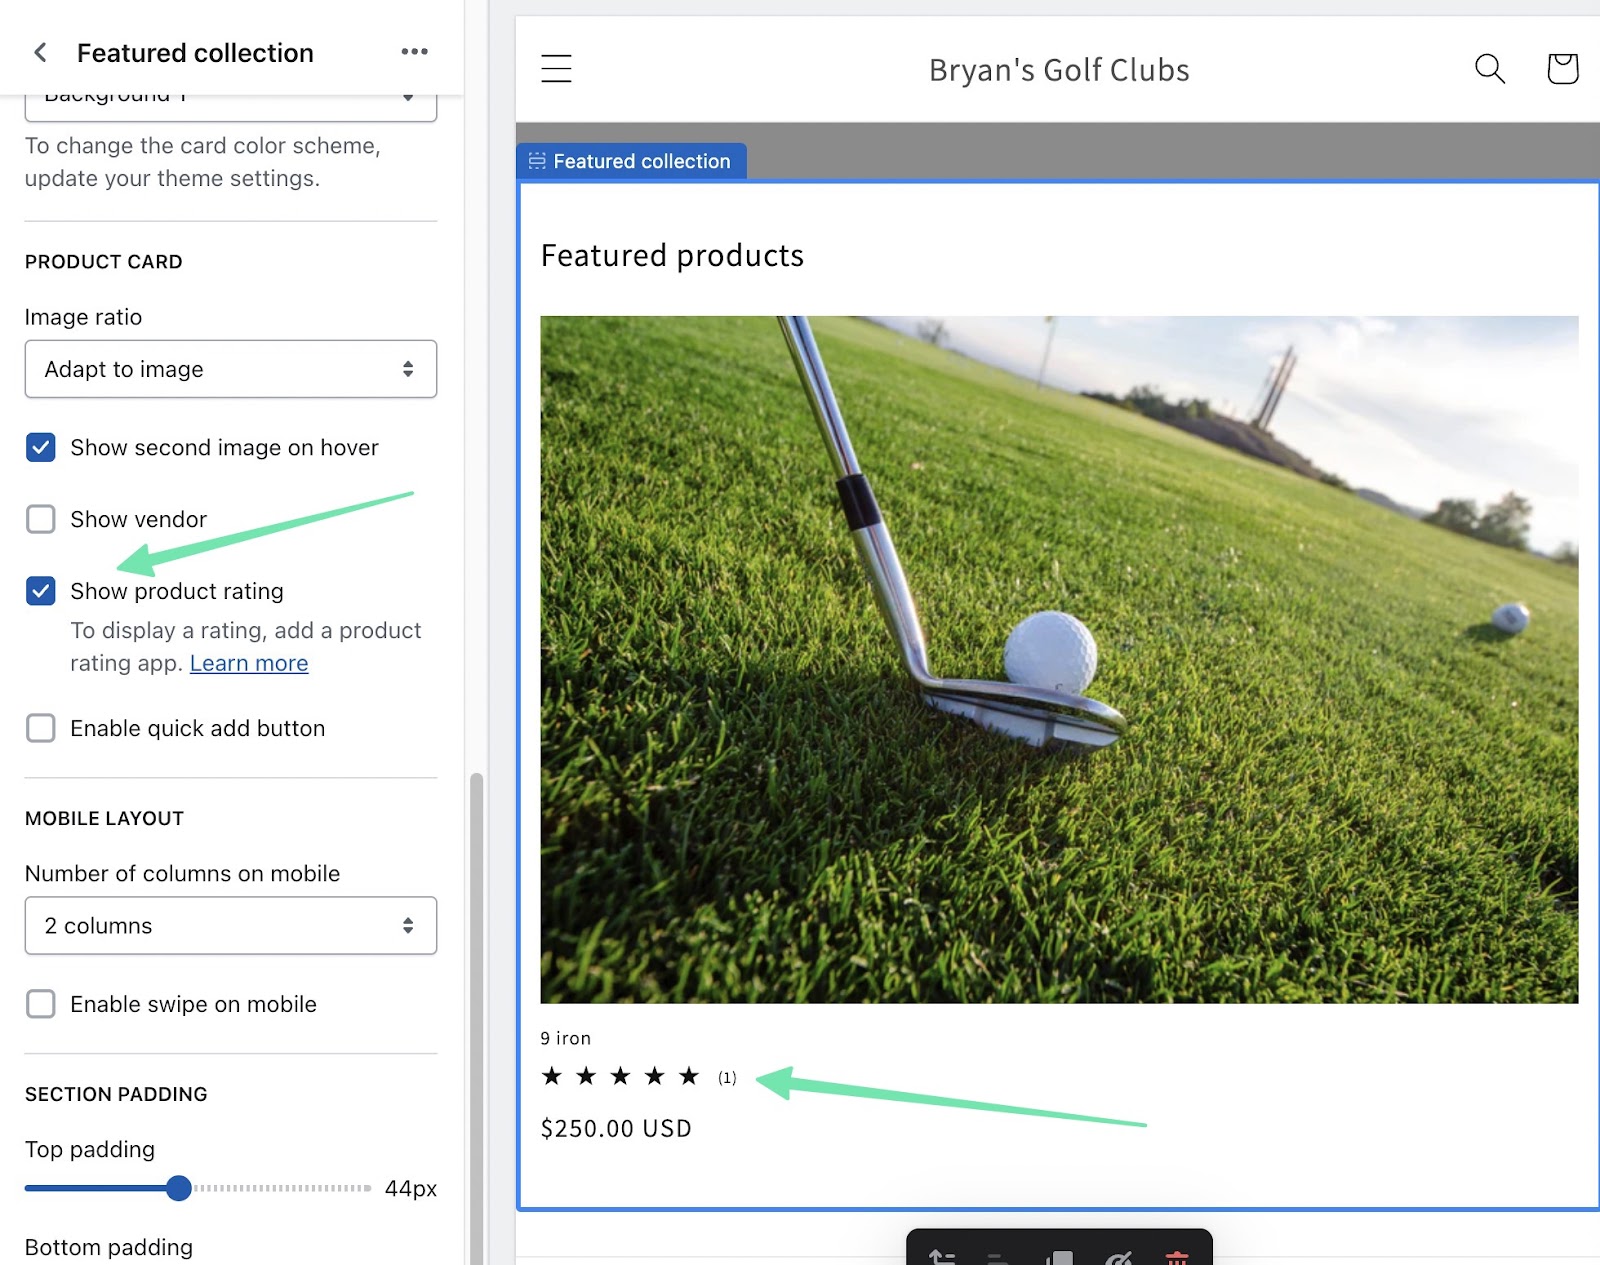
For instance, we have the Homepage open in the editor. You can add a Featured Collection to display multiple products on the homepage. Opening the Featured Collection settings shows an option to Show Product Rating. Check that box for the collection to always display product ratings for items in that collection.
It’s wise to do this on Product Collection templates; this way, ratings appear on product collections, no matter where they show up on your website. There’s no need to publish the ratings multiple times.
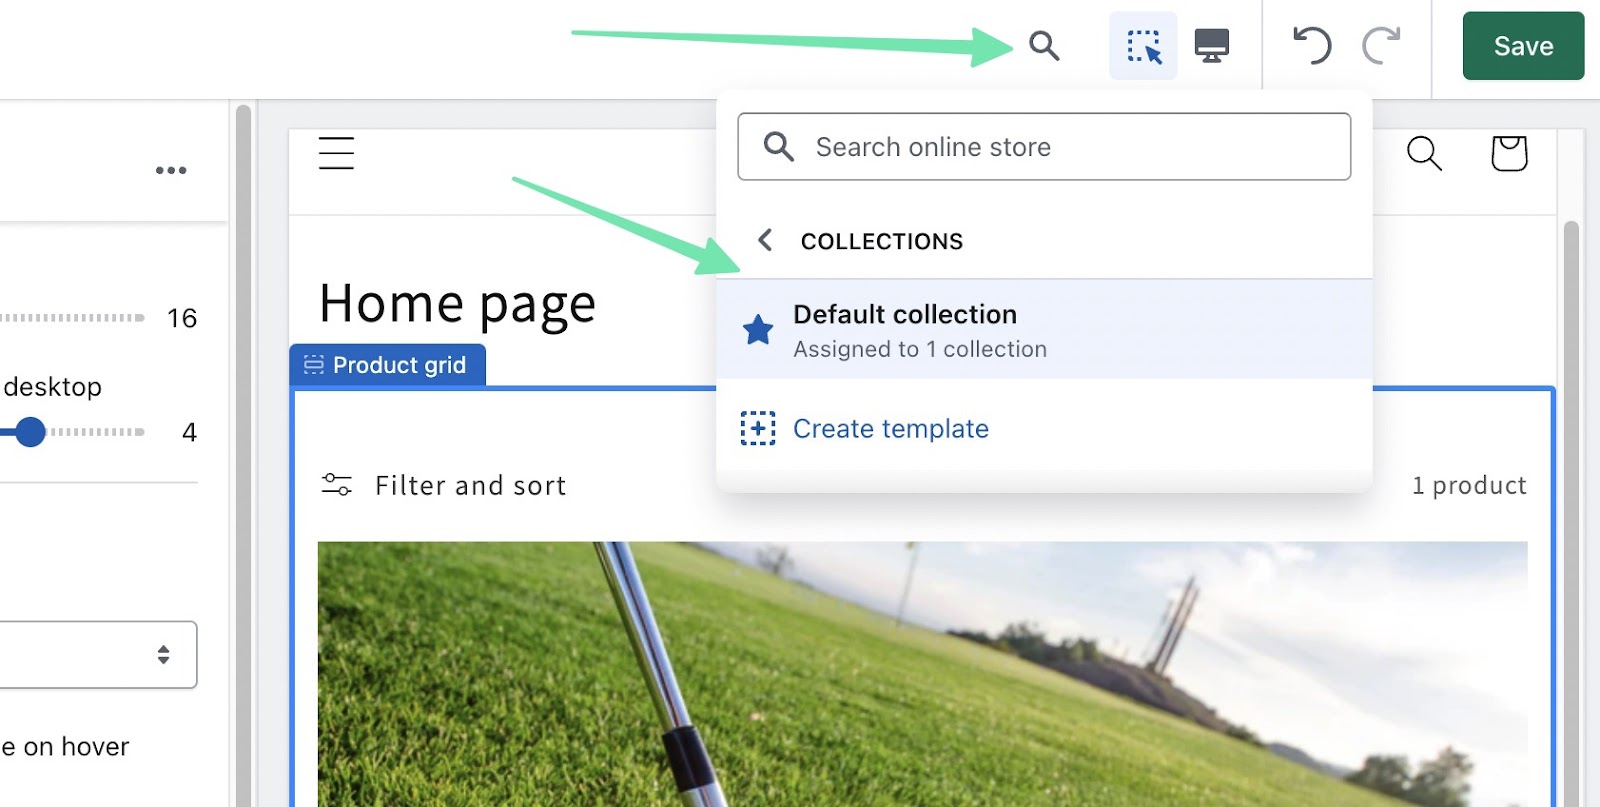
In the editor, search for your Collections templates, and choose a suitable match.
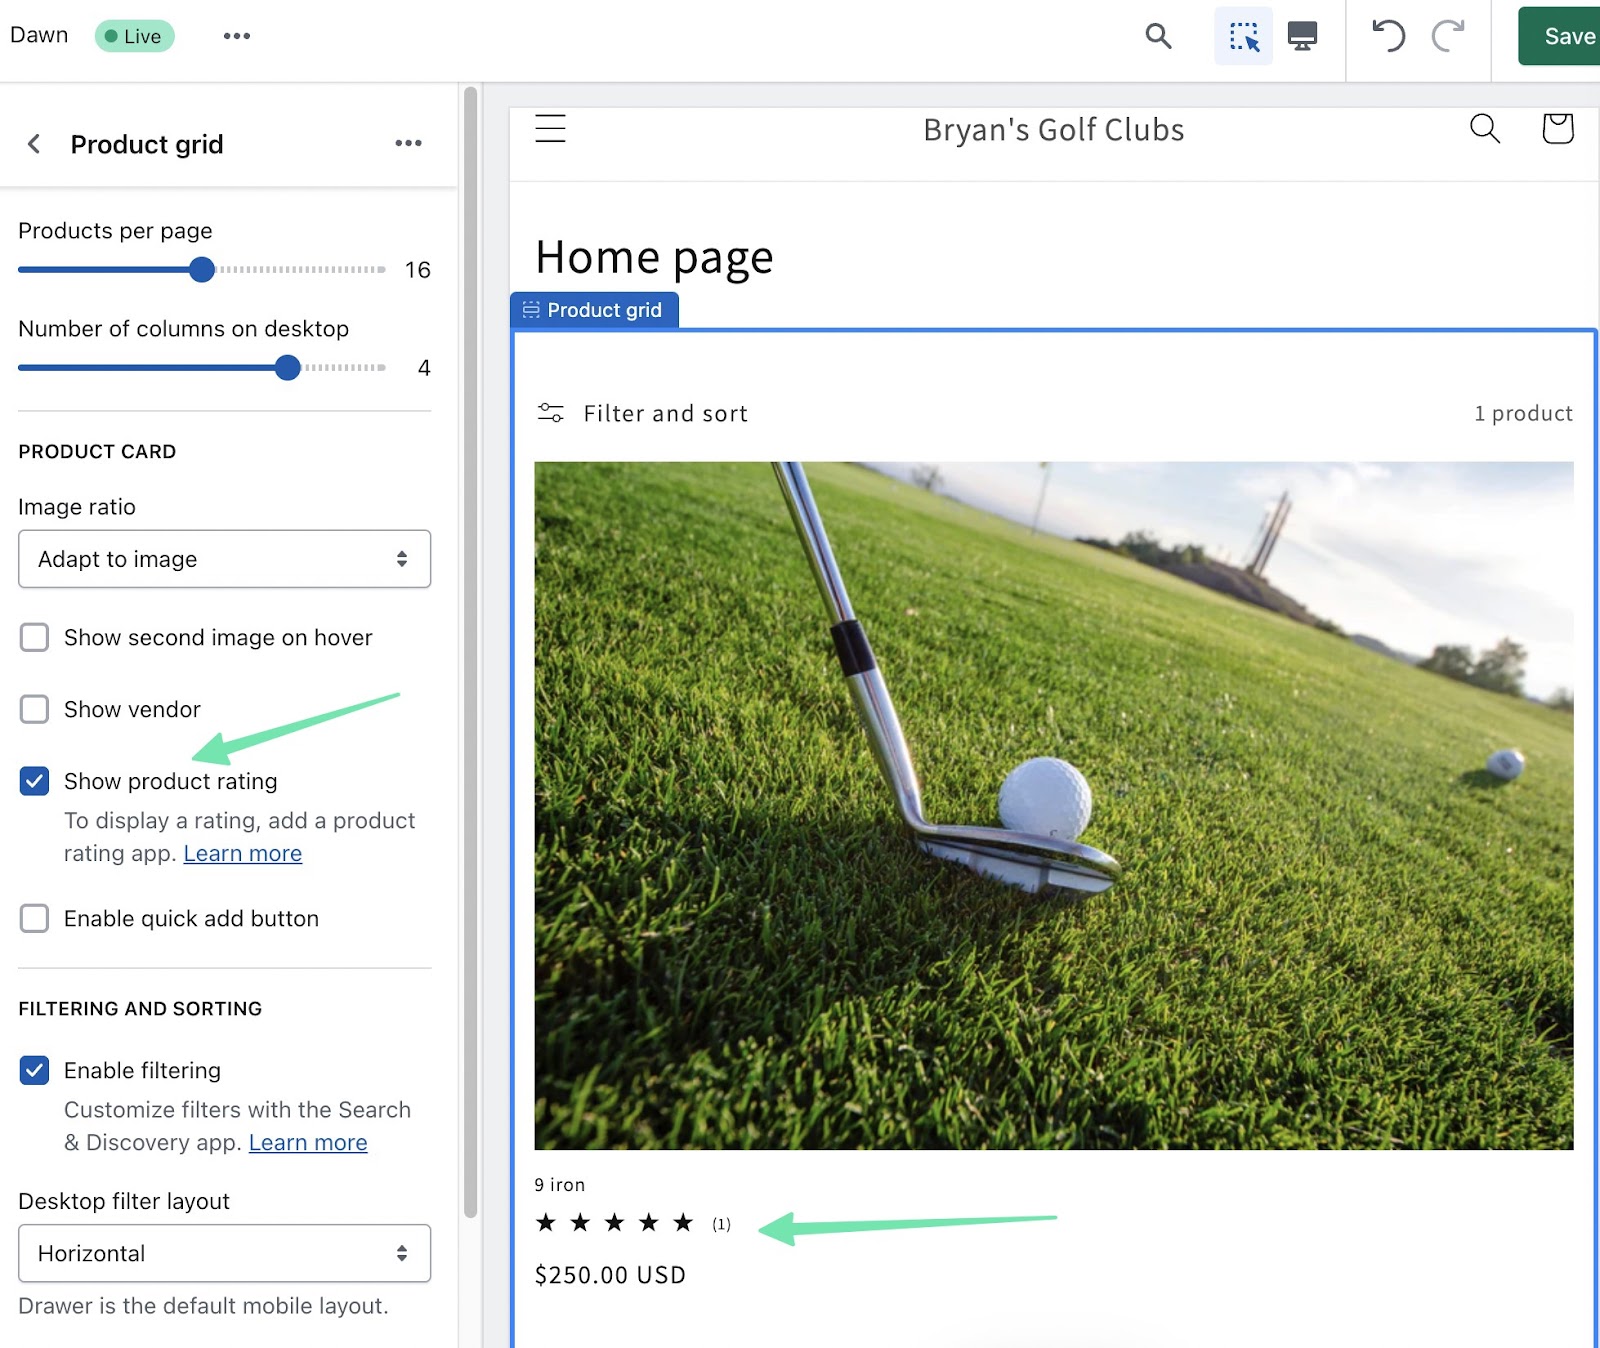
Click the Product Grid section to show its settings. Check off the Show Product Rating box. Now, every item inside that product grid, regardless of where it’s published, will have a rating.
Step 6: How to Import Reviews to Shopify from Other Sources
It’s possible you’re shifting content from a different ecommerce platform to Shopify. Or maybe your business has hundreds of reviews on a third-party site that you’d like to publish on your website.
In either case, it’s best to import those reviews in bulk.
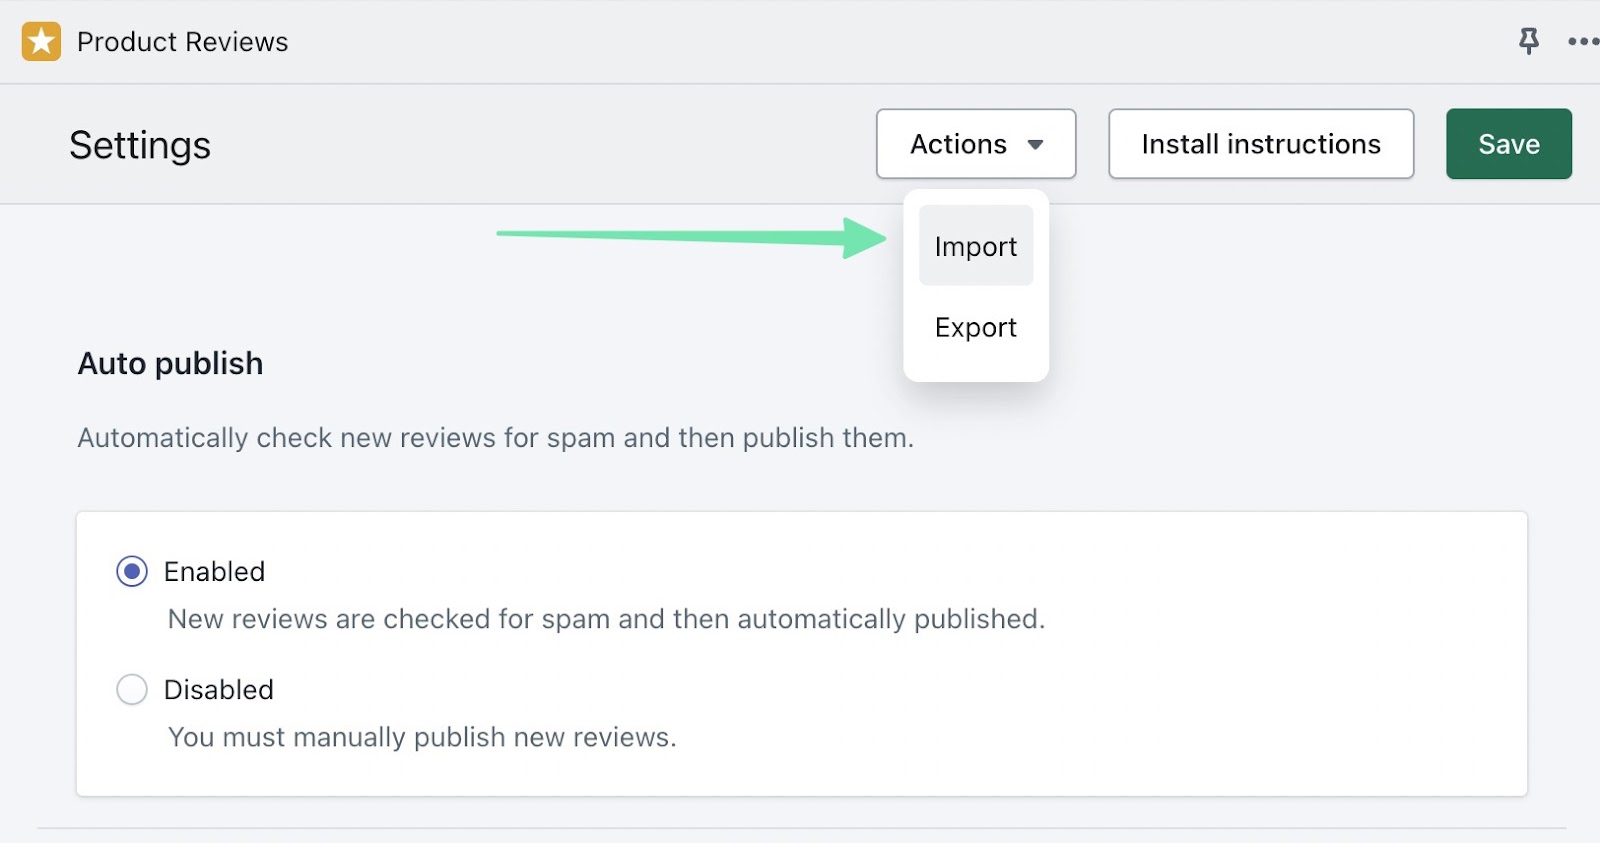
To do so, go to Apps > Product Reviews > Settings. Click the Actions tab, then select Import.
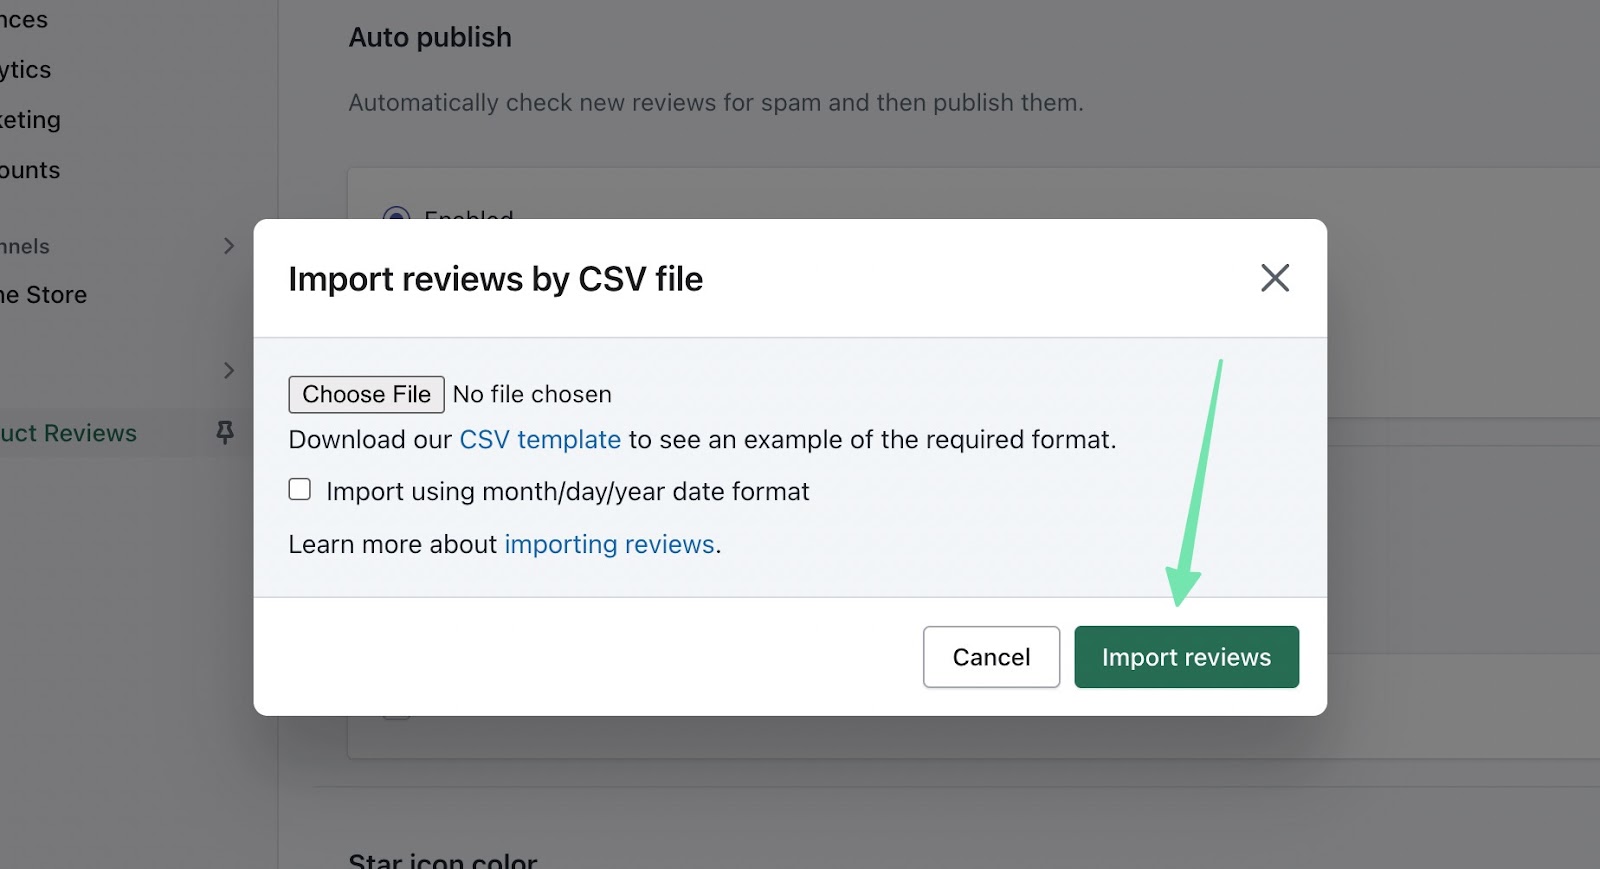
Product review imports are done using a properly formatted CSV file. Shopify offers a CSV template, along with a guide for importing reviews the right way.
When you have the CSV ready, click the Import Reviews button to upload the file and bulk upload all reviews.
Step 7: Manage Shopify Reviews from the Dashboard
Product review management involves exporting negative reviews for internal analysis, manually publishing reviews, flagging reviews as spam, and much more.
Once reviews start coming in for your products, go to Apps > Product Reviews in the Shopify dashboard.
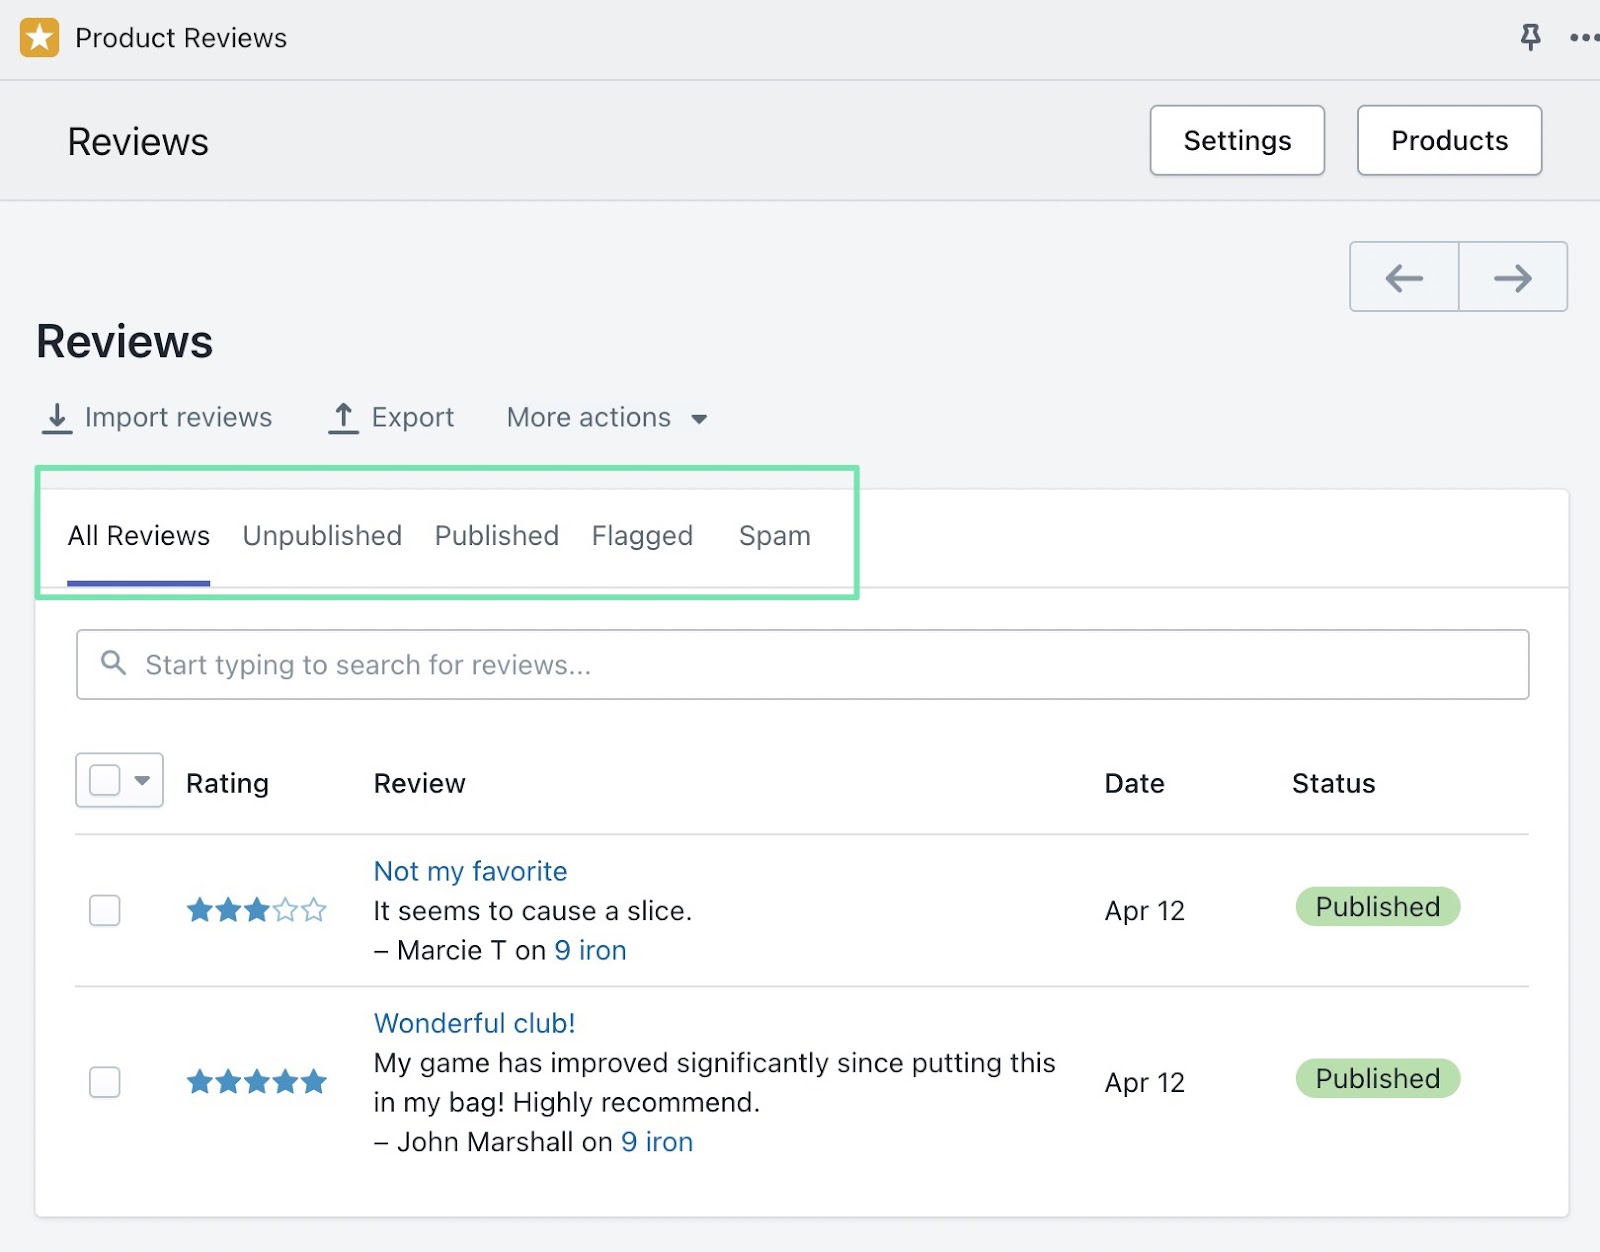
On that page, you’ll see a complete list of all product reviews submitted to your website. One way to manage the reviews is to filter the list.
Here are the filter options:
- All Reviews
- Unpublished
- Published
- Flagged
- Spam
There’s even a field to Search for reviews based on keywords.
That may get you wondering about flagging reviews for spam. If you notice that a review is completely irrelevant, or clearly from a bot, select the review in question, and click the Unpublished button. Shopify automatically tags reviews as spam, but you may find some that get through the filters.

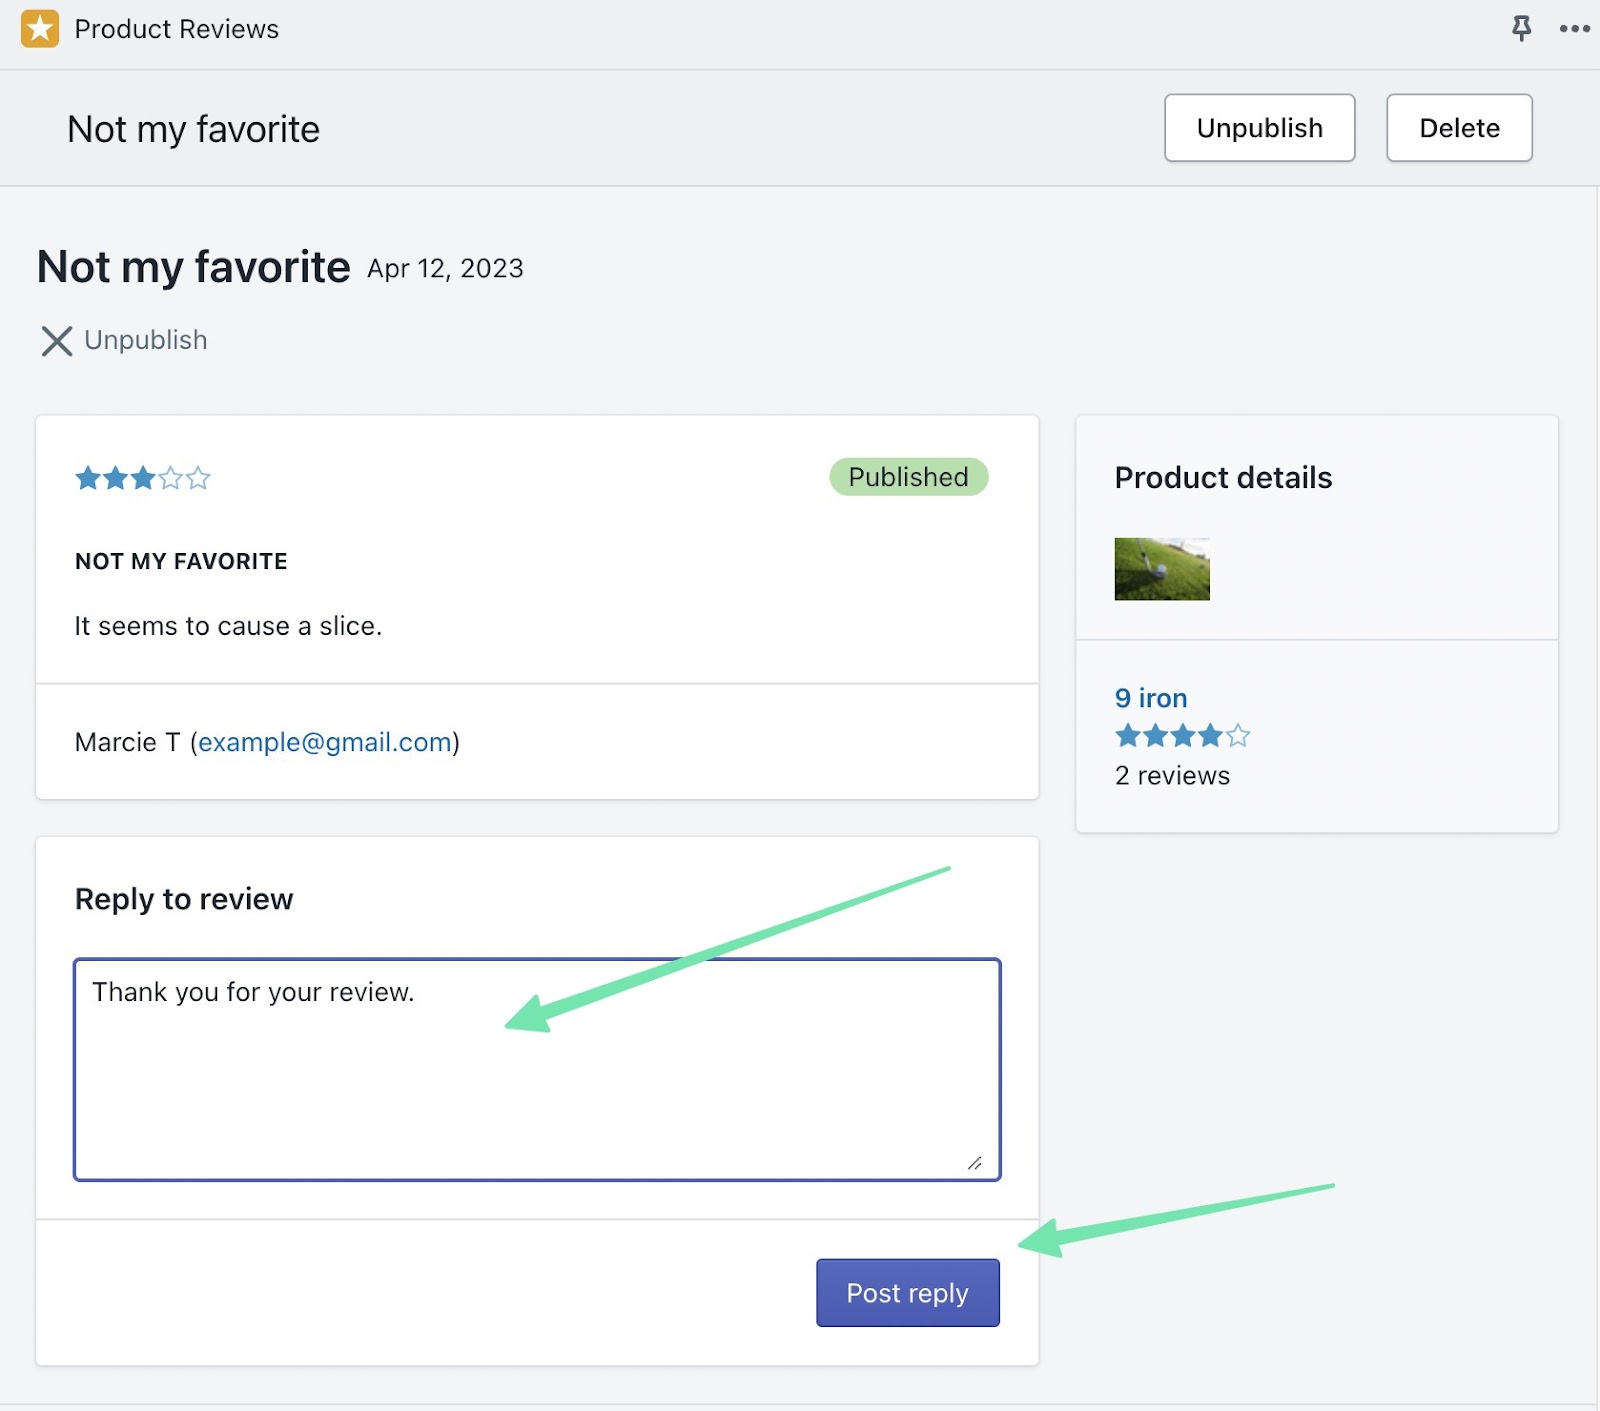
Opening a review also gives you the option to reply to that review. Replying to reviews shows that you’re responsive to customers and open to criticism.
Simply type the reply to a review in the box provided. Click on the Post Reply button to publish that message below the review in question. Another way to answer questions, or rectify issues, stated in reviews is to click on the email address from the reviewer for a more direct approach.
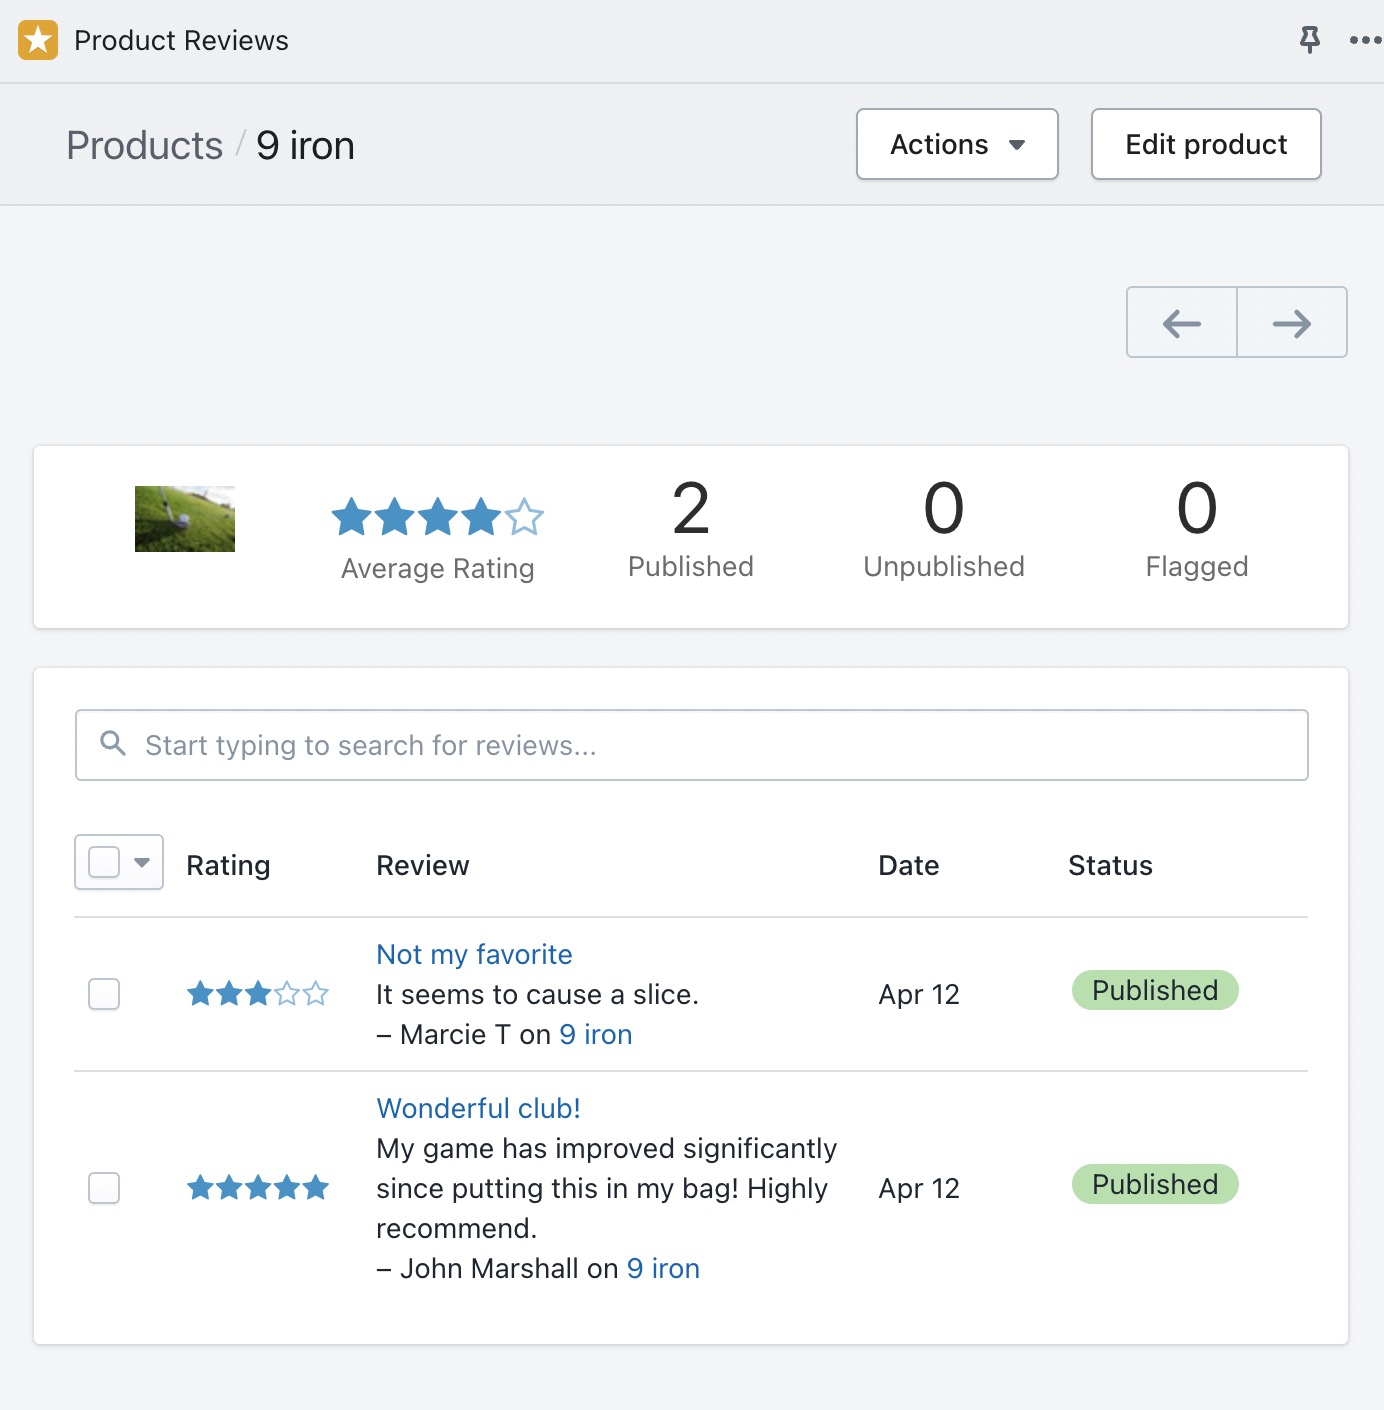
Finally, clicking on any item in the Product Reviews module reveals review statistics for that product only.
View the number of published, unpublished, and flagged reviews, and search for specific keywords in the list of reviews. This is one of the fastest ways to learn about how users feel about a particular product, and to reply to reviews en masse.
Go Forth & Add Reviews Shopify Today!
Once you’ve learned how to add product reviews to your Shopify store, it’s time to learn how to ask and get good customer reviews. Thereafter, every product review published on your site is available for display with ReConvert upsells. Show product reviews on upsells in the checkout module, with follow-up emails, on thank you pages, or any of the other places you’re able to upsell customers with ReConvert.
This combination of product reviews with upsells is sure to improve the overall trust and transparency of your brand, and hopefully lead to more conversions!
If you need any clarification about how to add product reviews to your Shopify store, please let us know in the comments section below.


.png)
