Shopify Password Protect Page: How to Create Protected Pages on Your Store
.png)
Welcome to our guide on setting up a password-protected page for your Shopify store.
Whether you're launching exclusive products, organizing members-only events, or simply looking to restrict access to specific content, Shopify's password protection feature provides a seamless solution.
In this step-by-step guide, we'll walk you through the process of creating and implementing a password-protected page, ensuring that your confidential information and premium content remain accessible only to those with the right credentials.
Let's get started on enhancing the privacy and exclusivity of your Shopify store!
{{cool-component="/style"}}
How to Create a Shopify Password Protect For Your Entire Store
Follow these steps to create a password protected page on your Shopify store:

- From your Shopify admin, go to Online Store > Preferences.
- Scroll to the Password protection area, and check ‘Restrict access to visitors with the password’.
- In Password, enter the password that you'll give to the customers who you want to be able to access your online store. Don't use the same password that you use to log into your admin.
- In Message for your visitors, enter the message that you want to show on the password page. If you don't want to show a message, then leave this field blank.
- Click Save.
You can remove the password from your store by unchecking the ‘Restrict access to visitors with the password.’ box and clicking Save. Doing this allows anyone to access your store.
How to Edit Your Shopify Password Page Settings
The standard Shopify password page is a bit dull. If you want to create something more branded, then you can edit the appearance of your password by following these steps:
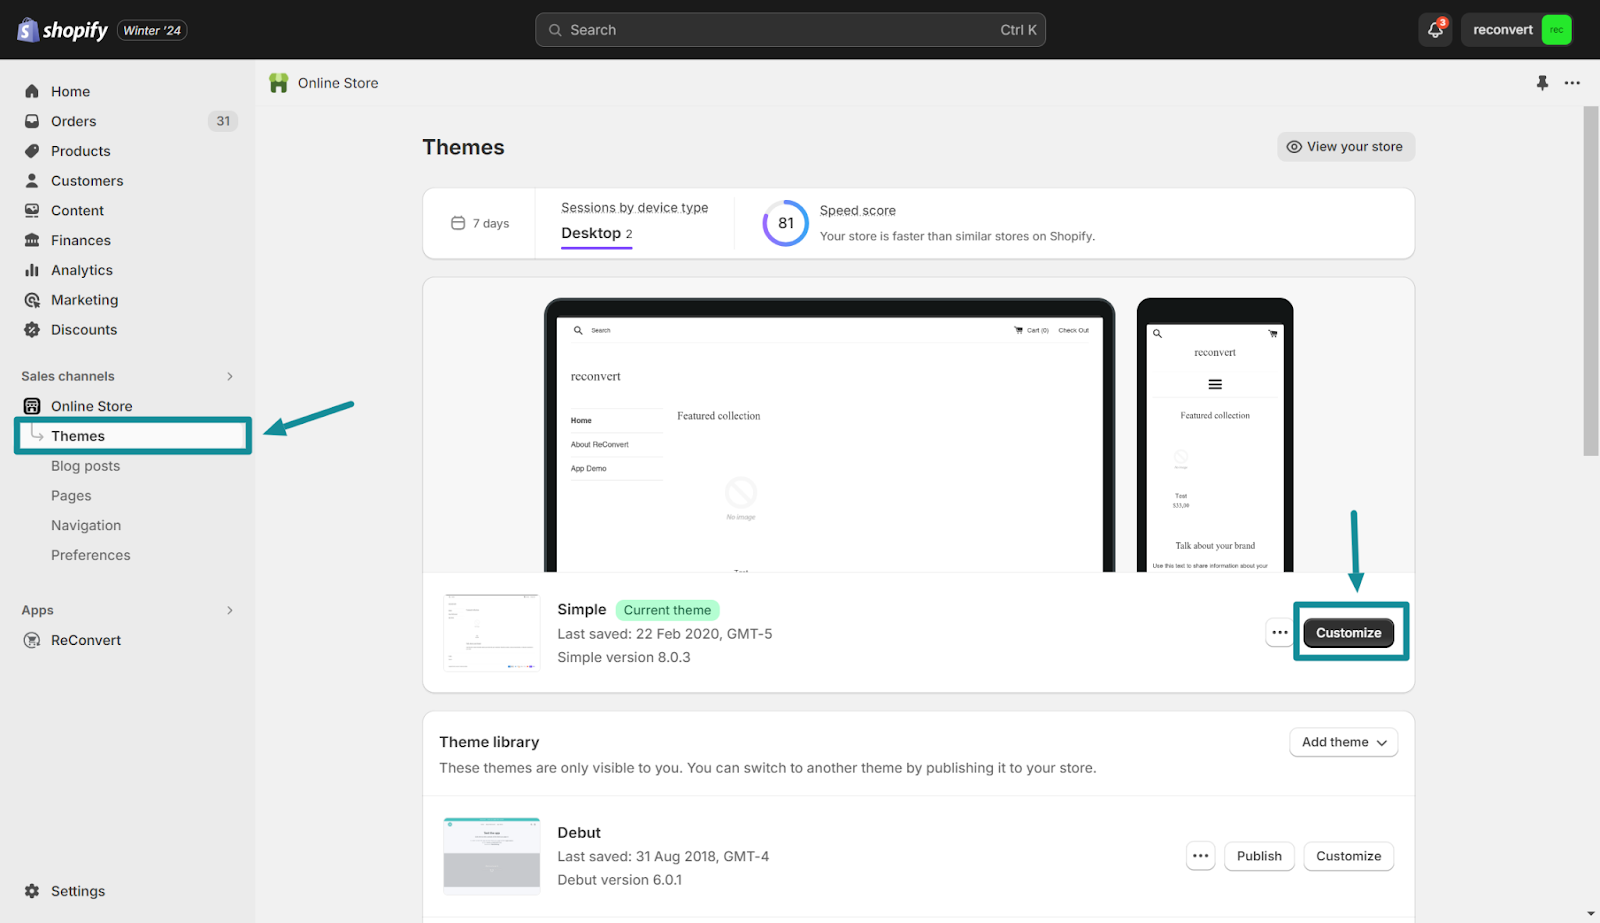
- From your Shopify admin, go to Online Store > Themes.
- Find the theme that you want to edit, and then click Customize.
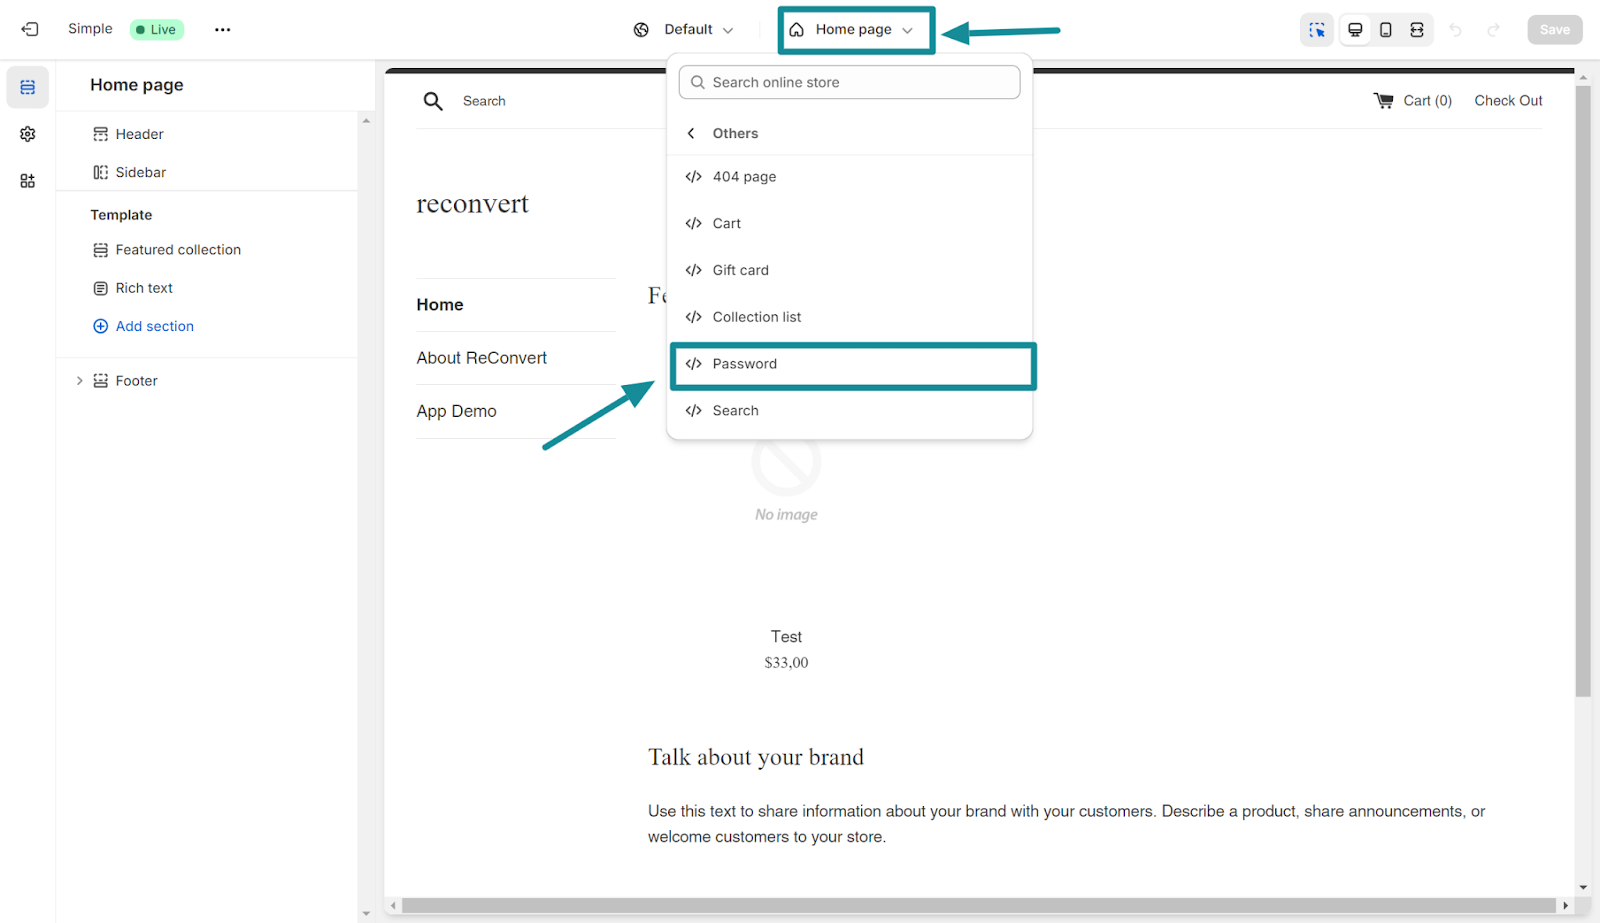
- At top of the page, Click Homepage, then scroll down & click Others > Password. If you don't see the Password page in the menu, then you need to activate password protection for your online store.
To edit the sections on the password page, do the following:
- Click the section that you want to edit. Most themes have header, content, and footer sections.
- Make changes to the section settings.
- Click Save.

- You can edit your theme settings, such as typography, color, social and favicon settings, to customize your password page. These settings also apply to the rest of your theme. To edit the theme settings, do the following:
- Click Theme settings.
- Click the settings category that you want to edit.
- Make changes to the theme settings.
- Click Save.
Create a Password Protected Page For Specific Pages
Creating a password for specific pages is a little trickier, but still possible. To do this, we’ll need to edit your theme's code - so it’s wise to create a back-up of your theme, in case anything goes wrong.
Once you’ve backed up your themes, here’s how to do create a password for specific pages in Shopify:
Step 1: Create Metafield Definition for Page Password
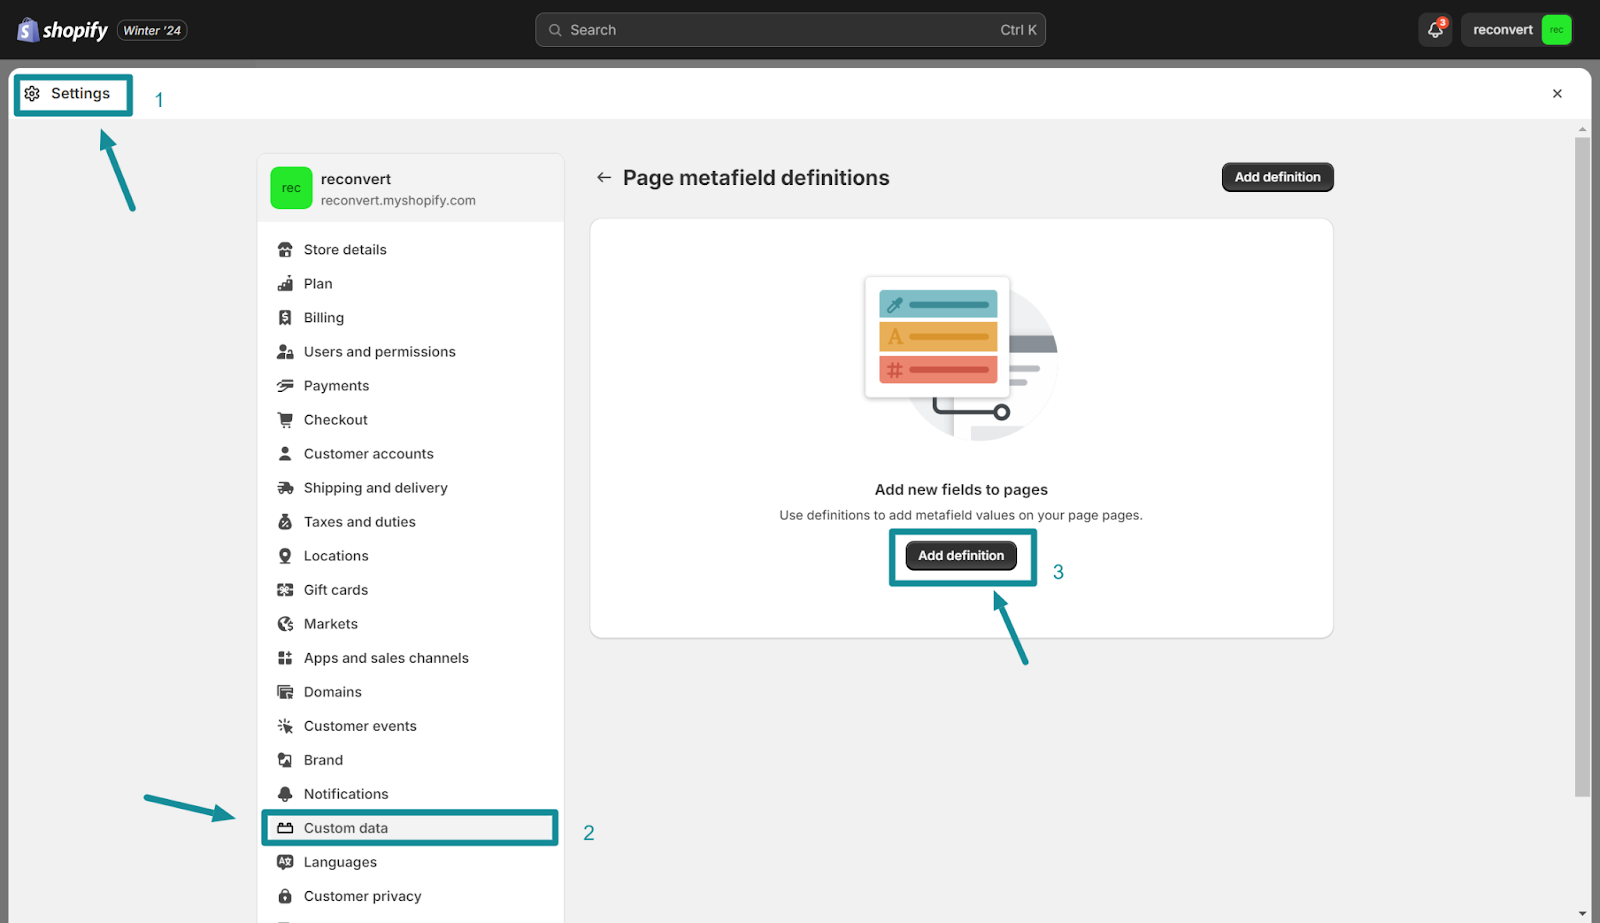
- Go to your Shopify Admin and navigate to "Settings."
- Select "Custom Data" on the left sidebar and click on "Pages."
- Click "Add Definition" and input "password" for the Name field.
- Ensure the "Namespace and key" field is set to custom.password.
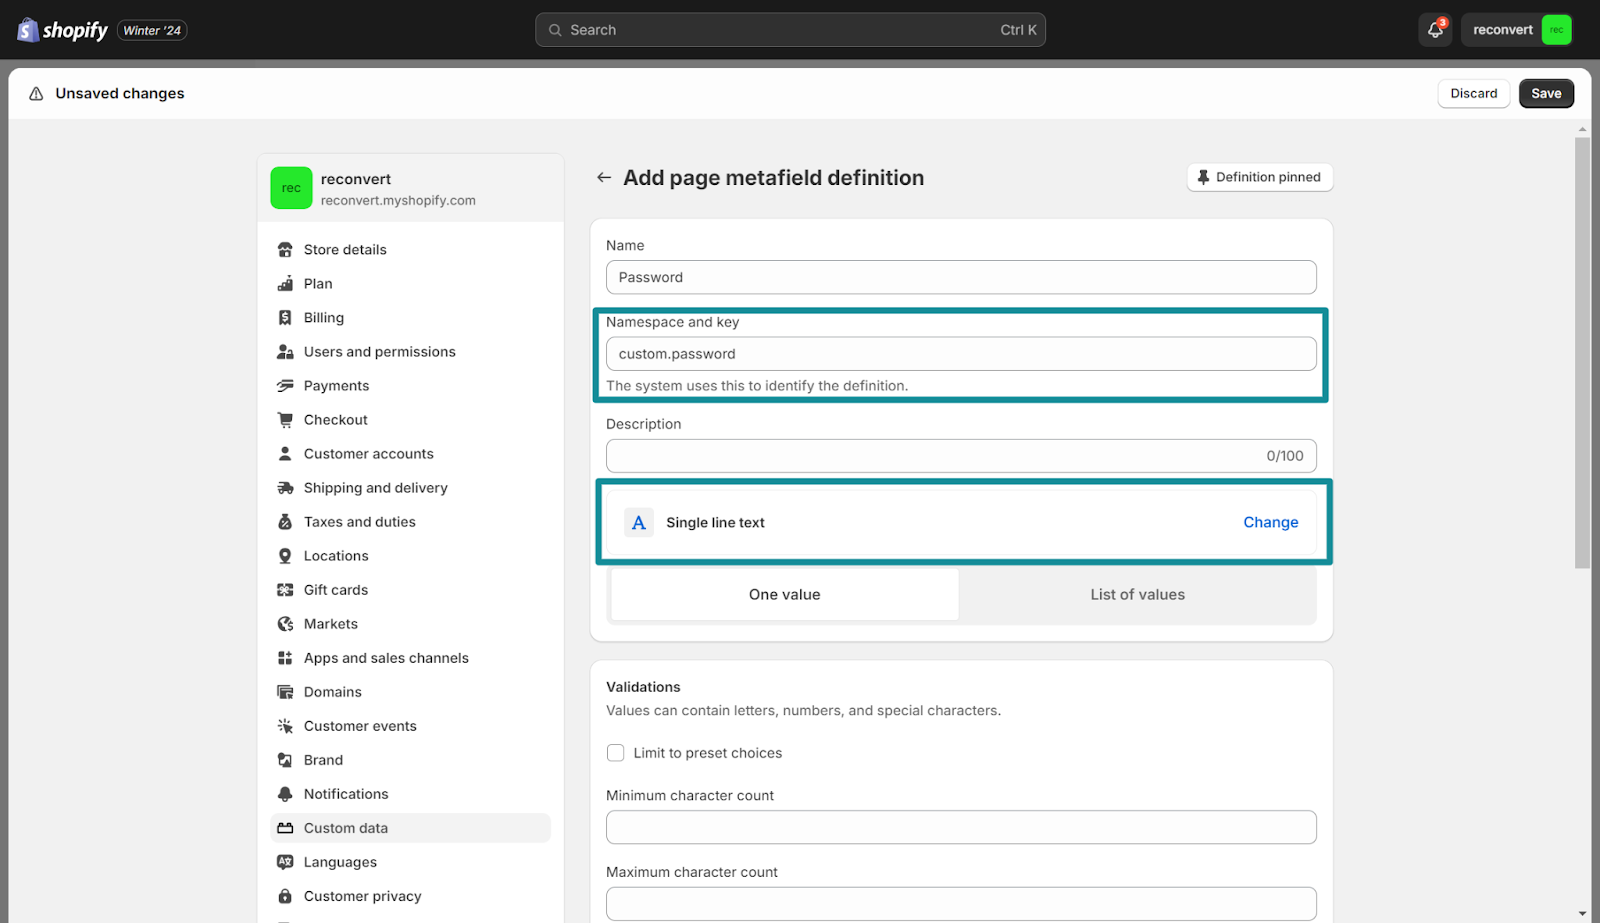
- Choose "Single line text" for the type and enable "Storefront access."
- Click "Save" to store the password value.
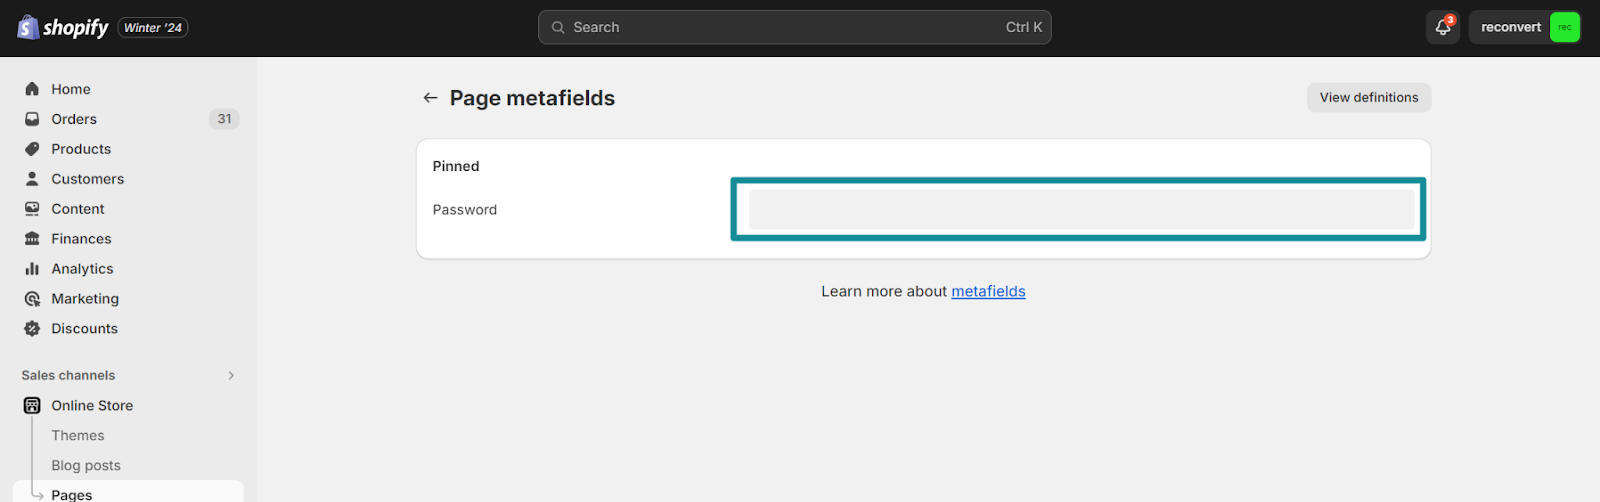
Step 2: Set Password for Desired Page
- Go to "Online Store" > "Pages" and select the desired page.
- Scroll down to the "Metafields" section and click "Show all."
- In the password metafield section, enter your desired password value.
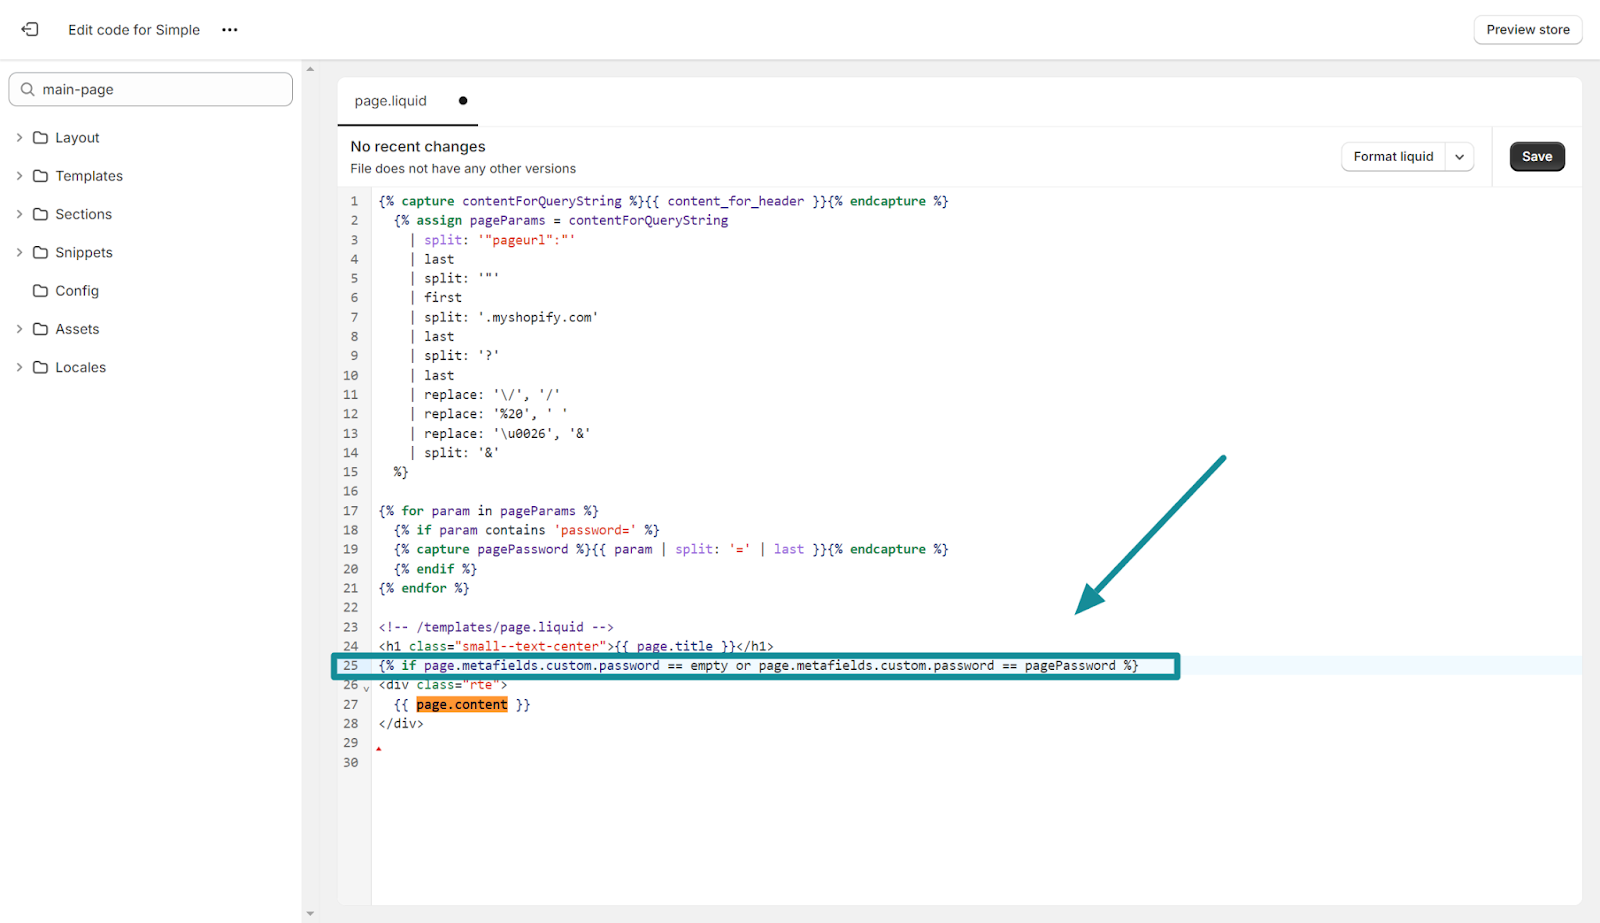
Step 3: Modify Theme Code for Password Input and Content Gating

- In Shopify Admin, go to "Online Store" > "Theme" and select "Edit Code."
- Search for "page.json" in the left sidebar and open the file.
- If not found, search for "page.liquid" and use it as a replacement.
- Paste the provided Liquid code (below) code at the top of the file.
Paste this code at the top of the file:
{% capture contentForQueryString %}{{ content_for_header }}{% endcapture %}
{% assign pageParams = contentForQueryString
| split: '"pageurl":"'
| last
| split: '"'
| first
| split: '.myshopify.com'
| last
| split: '?'
| last
| replace: '\/', '/'
| replace: '%20', ' '
| replace: '\u0026', '&'
| split: '&'
%}
{% for param in pageParams %}
{% if param contains 'password=' %}
{% capture pagePassword %}{{ param | split: '=' | last }}{% endcapture %}
{% endif %}
{% endfor %}
- Next, locate {{ page.content }} and add the following conditional Liquid code above it
Paste this code:
{% if page.metafields.custom.password == empty or page.metafields.custom.password == pagePassword %}
- Next search for ‘page.content’ again and paste this code below it:
{% else %}
<p>
{% if pagePassword %}
{{ section.settings.wrong_password_prompt_text }}
{% else %}
{{ section.settings.password_prompt_text }}
{% endif %}
</p>
<div class="field">
<input type="password" id="password-input" class="field__input" placeholder="Password" autofocus autocomplete="off" onkeypress="if(event.keyCode == 13){ window.location.href = '{{ request.path }}?password=' + this.value; }"/>
<br>
<button type="button" class="button" onclick="window.location.href = '{{ request.path }}?password=' + document.querySelector('#password-input').value;">{{ section.settings.submit_password_text }}</button>
</div>
{% endif %}

- Next, search for {% schema %} in the same file, and paste the following lines below the “settings: [” line :
{
"id": "password_prompt_text",
"type": "text",
"label": "Text to tell visitor to input password",
"default": "Please input password to view this page"
},
{
"id": "wrong_password_prompt_text",
"type": "text",
"label": "Text to tell visitor to input a correct password",
"default": "Wrong password, please try again"
},
{
"id": "submit_password_text",
"type": "text",
"label": "Text for the submit password button",
"default": "Submit"
},
Step 4: Customize Text Prompts
- Go to your theme and click "Customize."
- Navigate to the default page template in the Theme Editor.
- Click "Pages" > "Default page" and then the "Page" section on the left sidebar.
- Customize the text prompts for visitors on the password-protected page.
- Save the changes.
Step 5: Test and Implement
- Try accessing the password-protected page; you should see a password box with the text prompt.
- Enter a wrong password to ensure the content is only shown with the correct password.
- Set passwords for other pages by adjusting the metafield value.
Congratulations! You've successfully implemented password protection for specific pages on your Shopify store, adding an extra layer of security and exclusivity to your content.
Create a Shopify Password Protected Page Today!
By following this step-by-step guide, you've successfully implemented password protection for specific pages on your Shopify store.
This enhancement not only adds a layer of security but also allows you to curate exclusive content for a select audience. Your ability to create and manage password-protected pages offers a powerful tool for launching exclusive products, organizing members-only events, or sharing restricted content with a specific audience.
Remember to utilize this feature thoughtfully, providing a seamless and secure experience for your customers or members.
As you continue to leverage the robust features of Shopify, you're well on your way to creating a tailored and exclusive online shopping experience. If you have any further questions or need assistance, Shopify's support resources are readily available to guide you on your ecommerce journey. Happy selling!
{{cool-component="/style"}}
Shopify Password Protect Page FAQ
Let’s quickly cover some of the most commonly asked questions related to Shopify password protect pages:
Can you password protect a specific page on Shopify?
Yes, you can. Create a metafield definition for the page password, set a password, and modify the theme code to add a password input box and gate the content.
How do I make my Shopify page private?
Utilize password protection. Create a password-protected page from your Shopify settings -> Preferences -> and check ‘Restrict access to visitors with the password’. Alternatively, you can add password protection to specific pages by editing your theme’s code.
Can I make a password-protected collection on Shopify?
Shopify primarily supports password protection for pages. While there isn't a native feature for password-protected collections, you can achieve a similar effect by creating a password-protected page and linking to the collection from there.
How do I change my password-protected screen on Shopify?
Customize the text prompts in your theme settings. In the Theme Editor, navigate to the default page template, click on "Page" in the left sidebar, and customize the text prompts for visitors on the password-protected page.
.png)

Relevant Blogs

.jpg)

